I run the restaurant
First login, day-one setup, menu, storefront, team, AI assistant, growth tools and settings.
1.Your first login
Your account, your restaurant's address, and the first screen you land on
Every restaurant on FoodFlow has its own address. You don't sign in on a shared page and then pick a restaurant — you go straight to yours.
- Open your restaurant's link
It looks like
yourname.foodflo.app/dashboard— the activation email has yours. - Sign in with your email and password The email the restaurant was registered with. Forgot it? Use "Forgot password" and a reset link arrives by email.
- You land on the home screen Today's orders, revenue, your top-selling items, and a short setup checklist while the restaurant is still new.
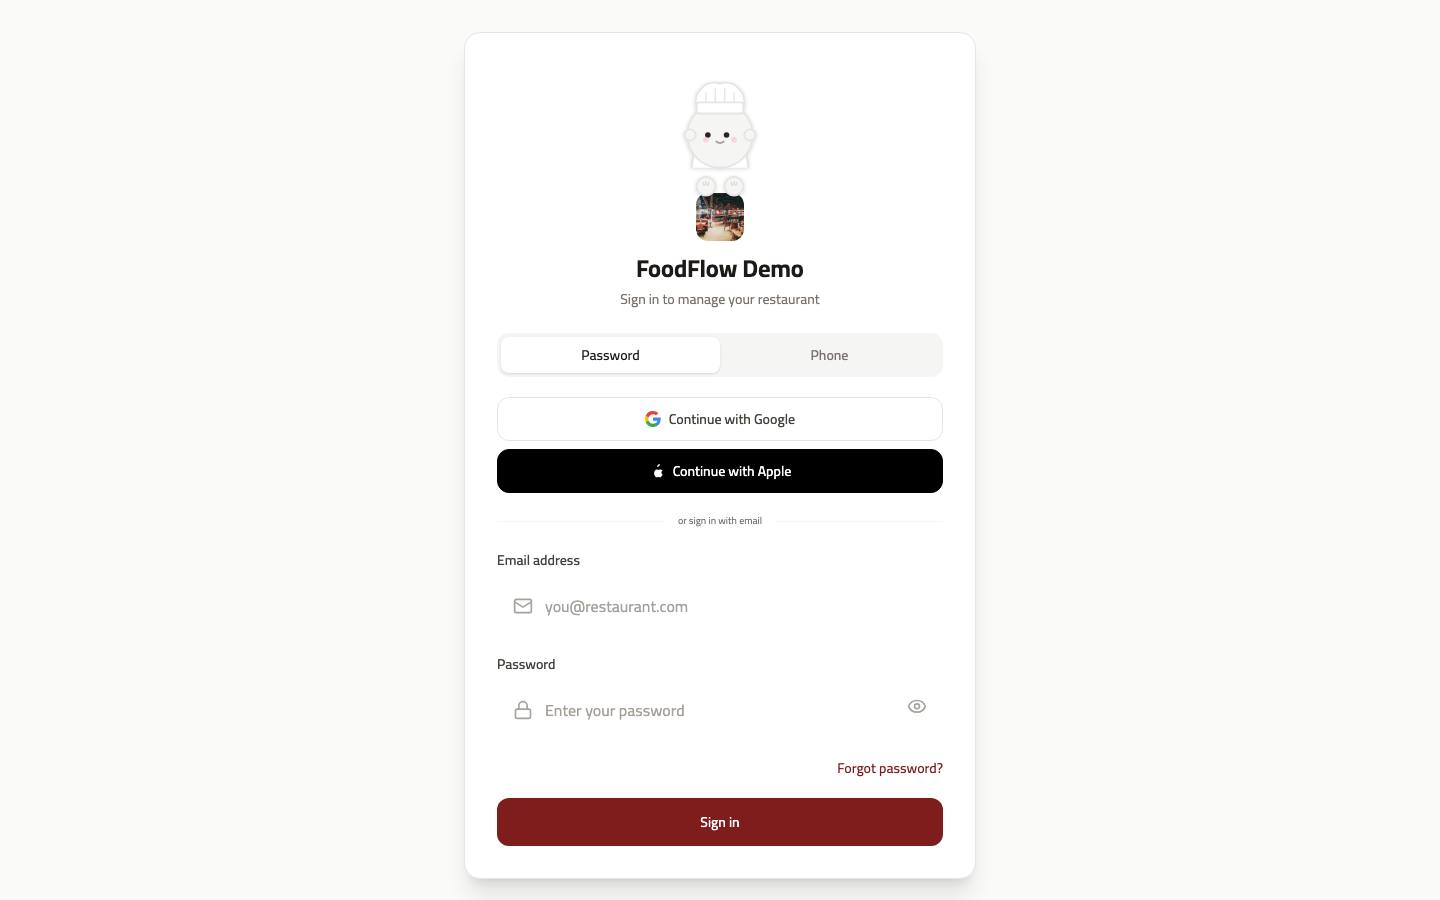
The login screen — email and password, then straight to the dashboard.
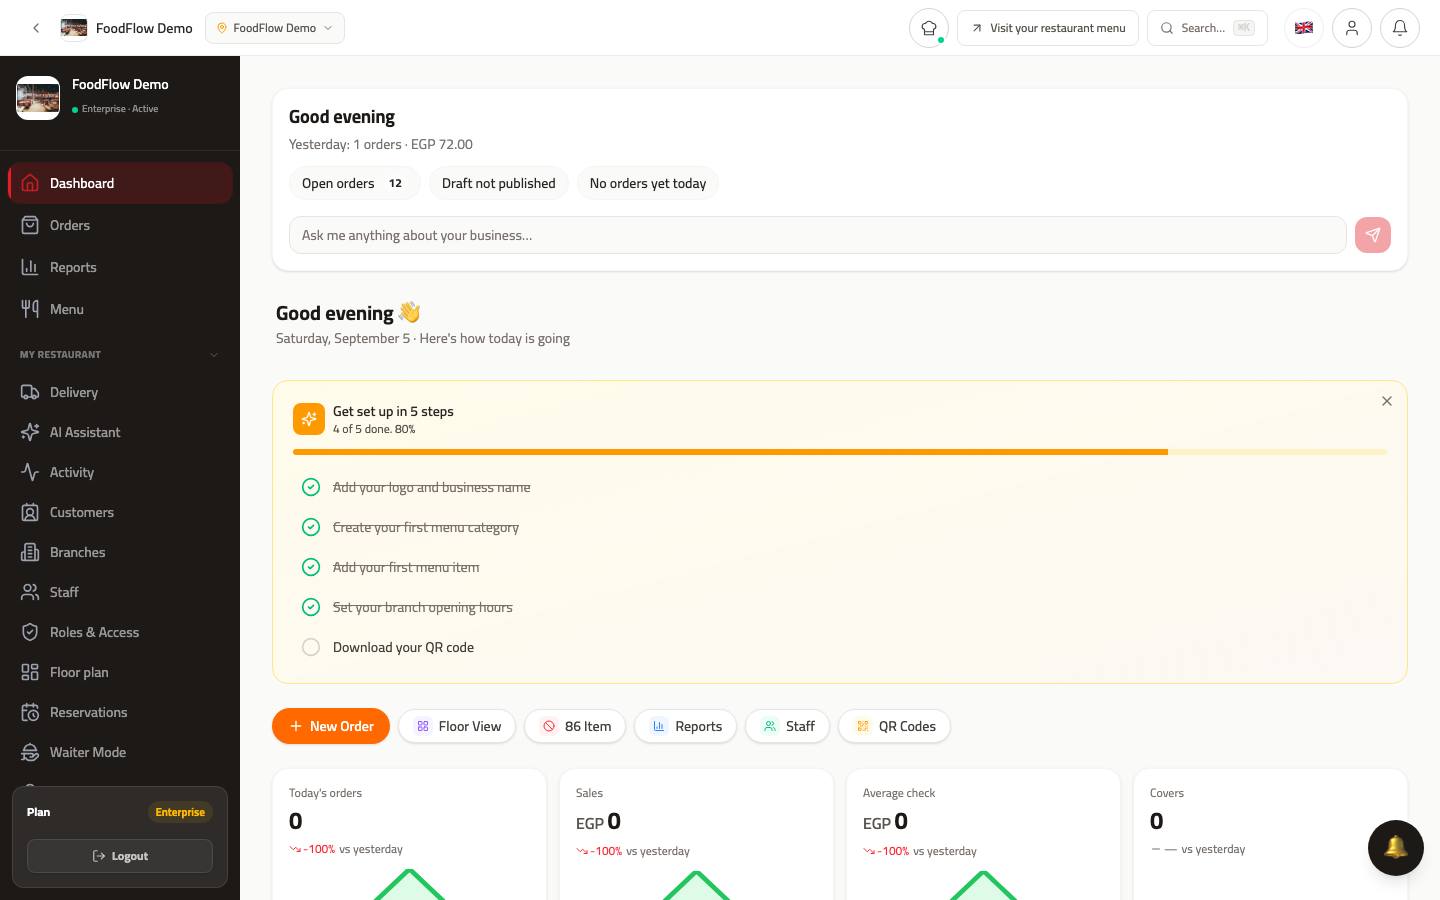
The home screen right after login: the setup checklist, quick actions, and today’s numbers.
Heads up
If you see a "role unresolved" banner, your account exists but isn't attached to a role yet. Ask the owner to open
/dashboard/rolesand assign you one.
2.The map of the dashboard
The sidebar splits into four groups — start here
You don't need to memorise it. Every section lives inside a group, and the group tells you what that section is for.
| Group | What's inside | When you open it |
|---|---|---|
| Today & Orders | Dashboard, Orders, Analytics, Menu | Every day |
| Grow | Link Hub, Smart Links, Promo Codes, Loyalty | When you run an offer or a campaign |
| My Restaurant | Branches, Staff, Roles & Access, Floor Plan, Reservations, Waiter Mode, Kitchen, Delivery, Customers, Activity | At setup, and each time you grow |
| Settings | Branding, Translations, Bot Settings, Integrations, Payments | Mostly once |
Shortcut
A locked section belongs to a higher plan. You'll find those grouped at the bottom of the sidebar under "Upgrade to unlock more".
3.Day-one setup
Five steps and you can take your first order
The home screen shows this same checklist and ticks each item off as you finish it. Do them in order — each one builds on the last.
- Upload your logo and colours
/dashboard/branding— the logo and colours carry into your menu, receipts, and link page. - Create your first category
/dashboard/categories— like Grills, Drinks, Desserts. A category has to exist before an item can go in it. - Add your first item
/dashboard/menu— name, price, photo, category. The photo moves sales more than anything else on the card. - Set your hours and branch
/dashboard/branches— address, phone, and open/close times per day. Outside those hours the menu stops taking orders on its own. - Print your QR code
/dashboard/qr— download it and put it on the tables. A customer scans and orders from their phone.
The 5-step checklist stays on screen until you finish it.
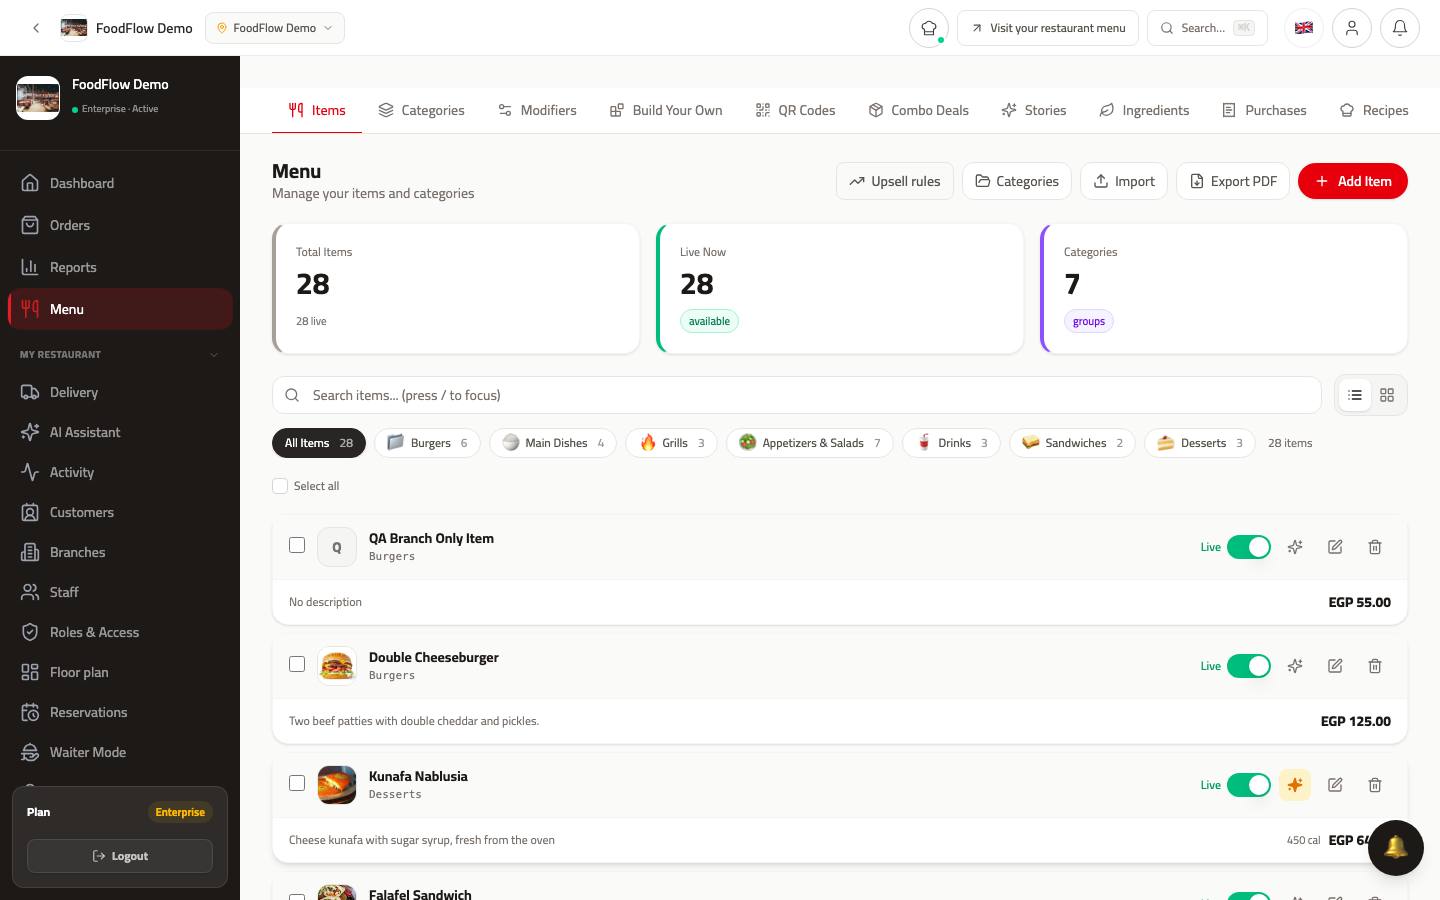
The Menu screen — categories on one side, their items inside.
5.The menu, as your customer sees it
A real walkthrough of the live demo storefront
These are real screens from the live demo restaurant. Everything you set in the dashboard lands here immediately — so to check a change, open the menu the way a customer does.
Open the menu link. The header carries the restaurant's name, contact details, search, cart, and the language switch.
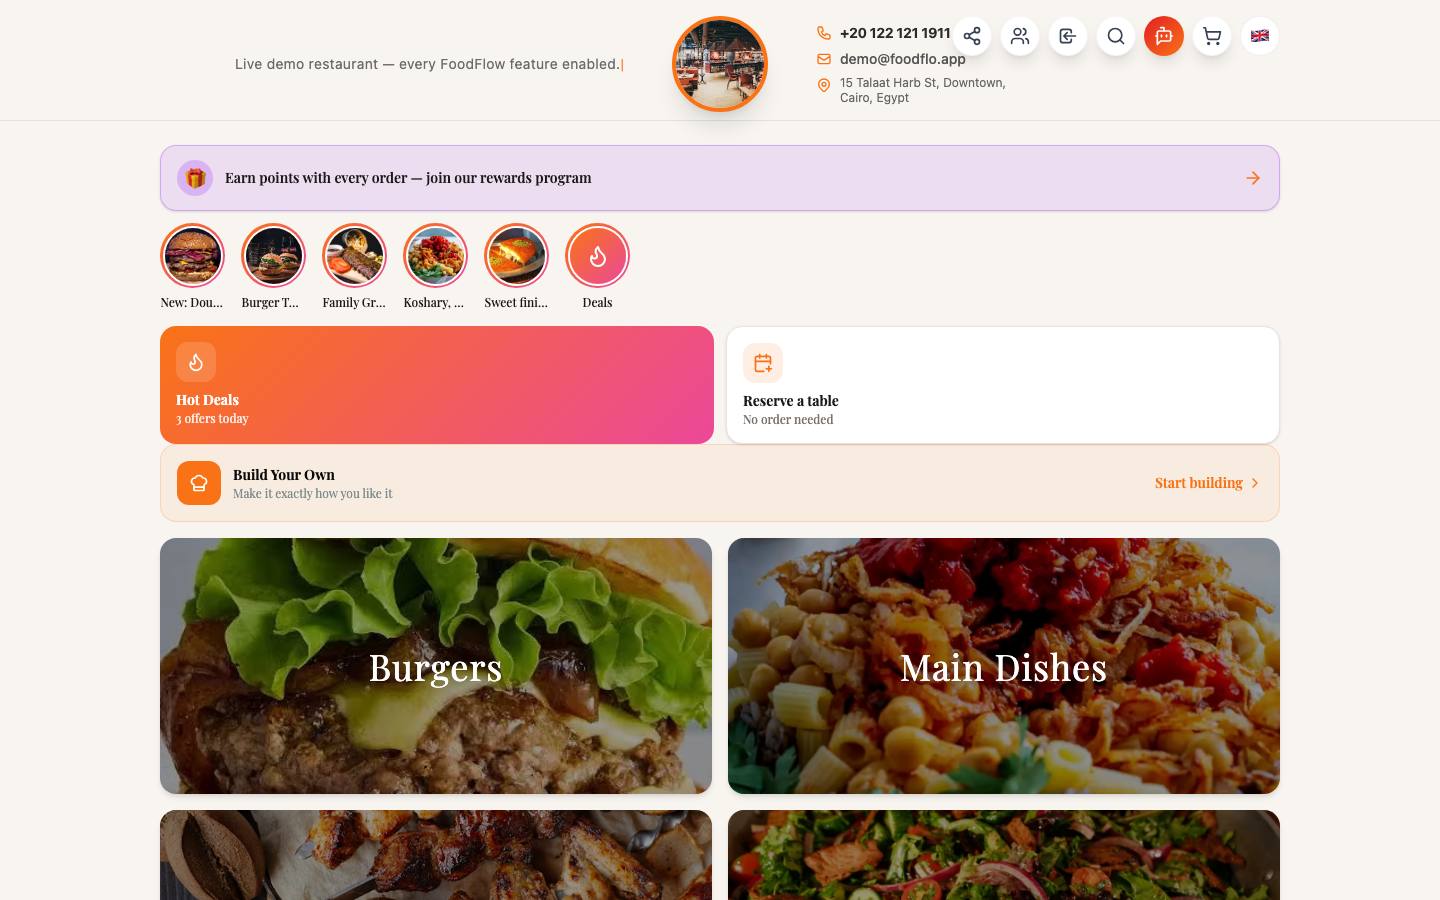
Story rail, loyalty banner, and category cards — all configured from the dashboard.
The Hot Deals card gathers today's offers in one place, next to Reserve a table for booking without ordering, and Build Your Own for a customer-assembled item.
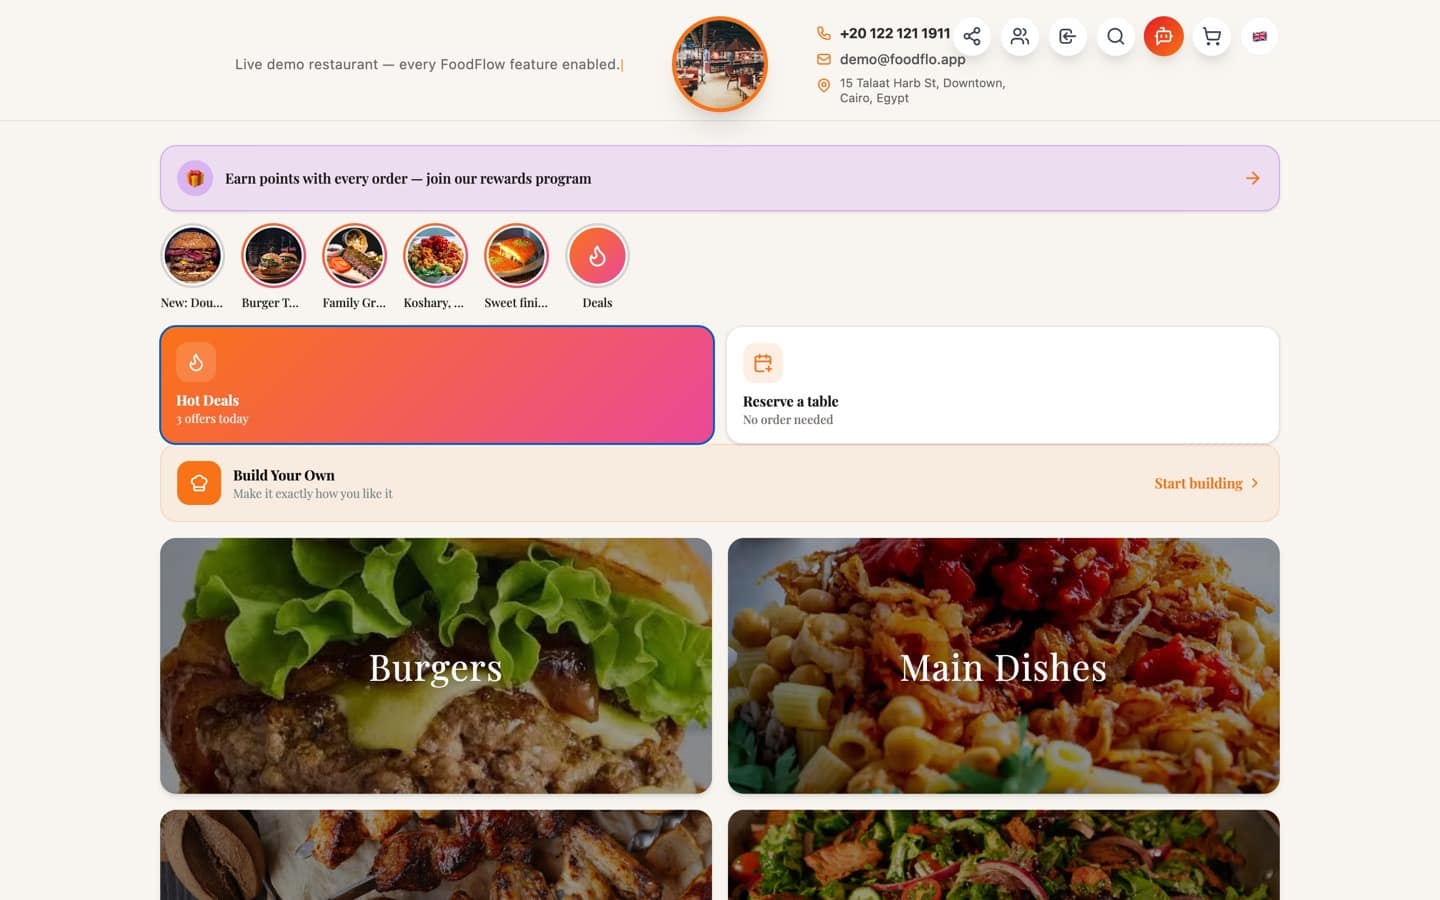
The offer count updates itself from your live promotions.
Tapping a category — Burgers here — opens its items with photos and prices, and from there the customer picks an item and adds it to the cart.
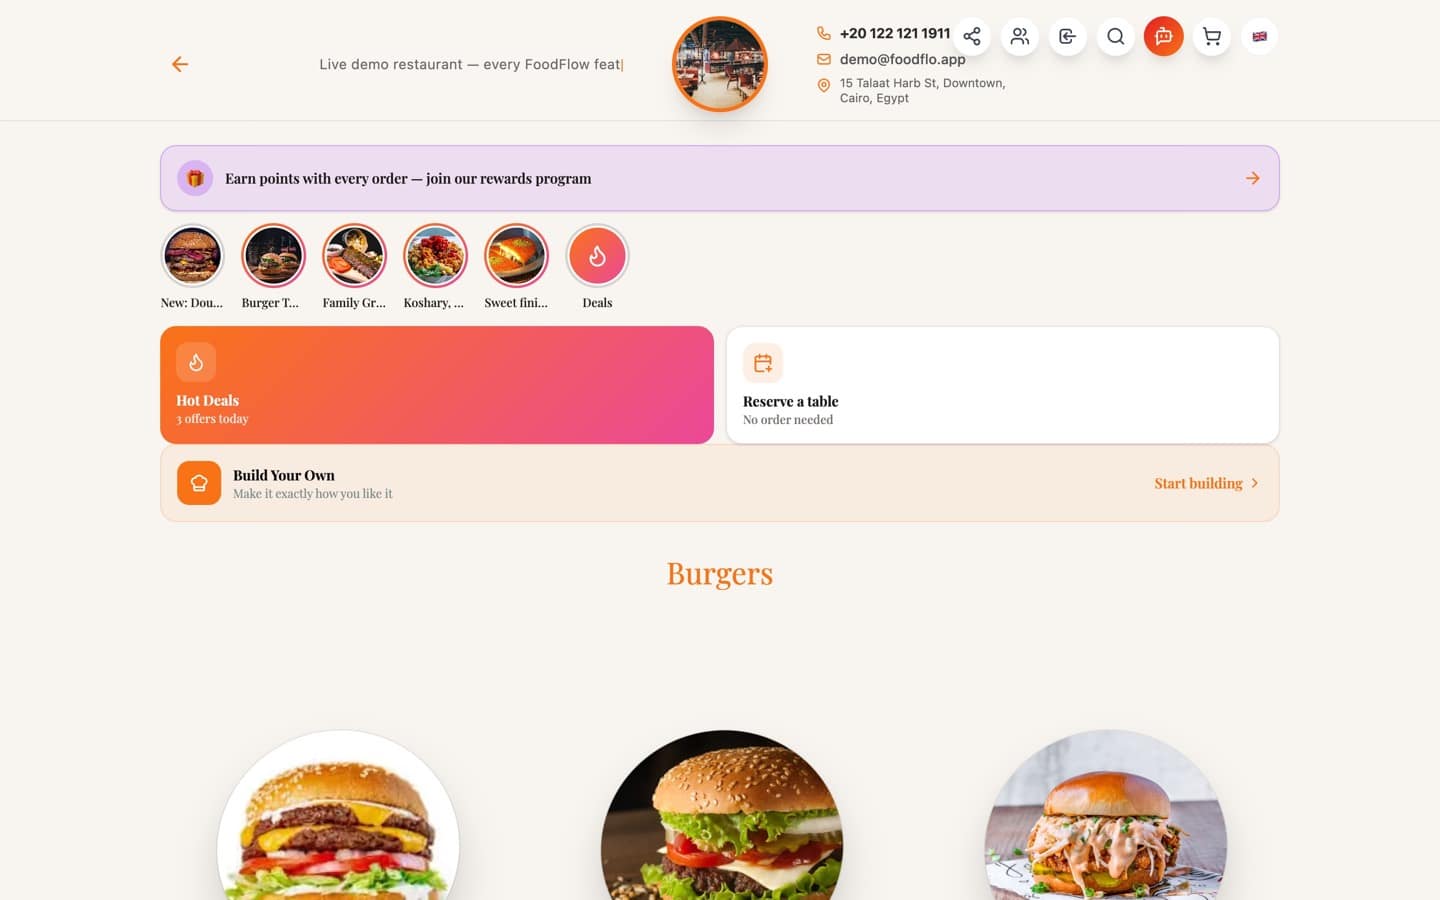
The item order here is exactly your order in /dashboard/menu.
The search button searches the whole menu by name — no scrolling required.
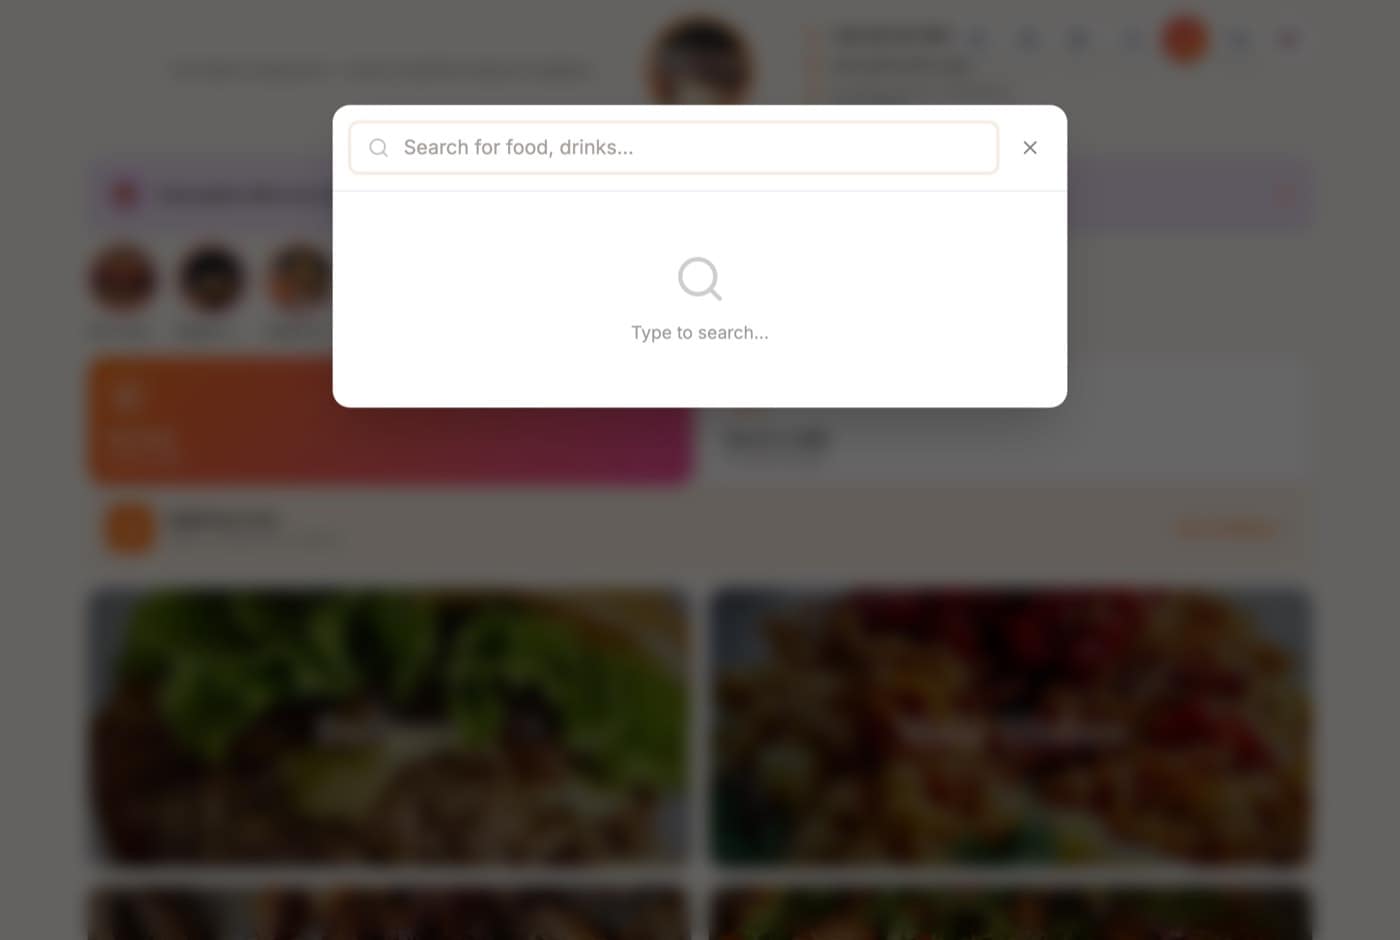
Search works in whichever language the menu is open in.
The flag button switches Arabic ↔ English — the whole page flips direction with it.
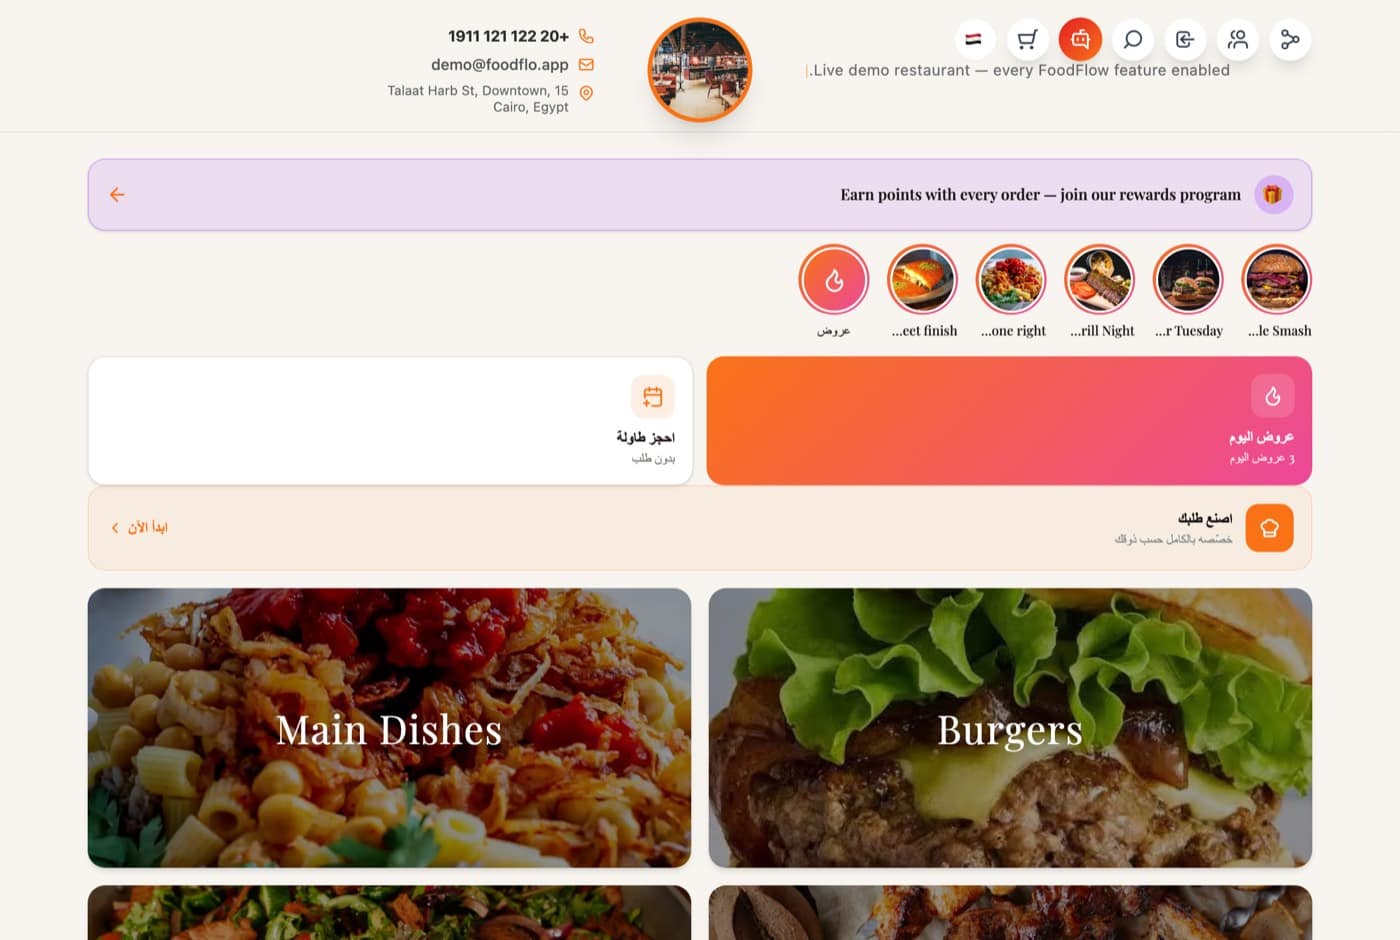
Names and descriptions come from your own translations in /dashboard/translations.
The stories rail at the top works like Instagram stories — your offers play inside it.
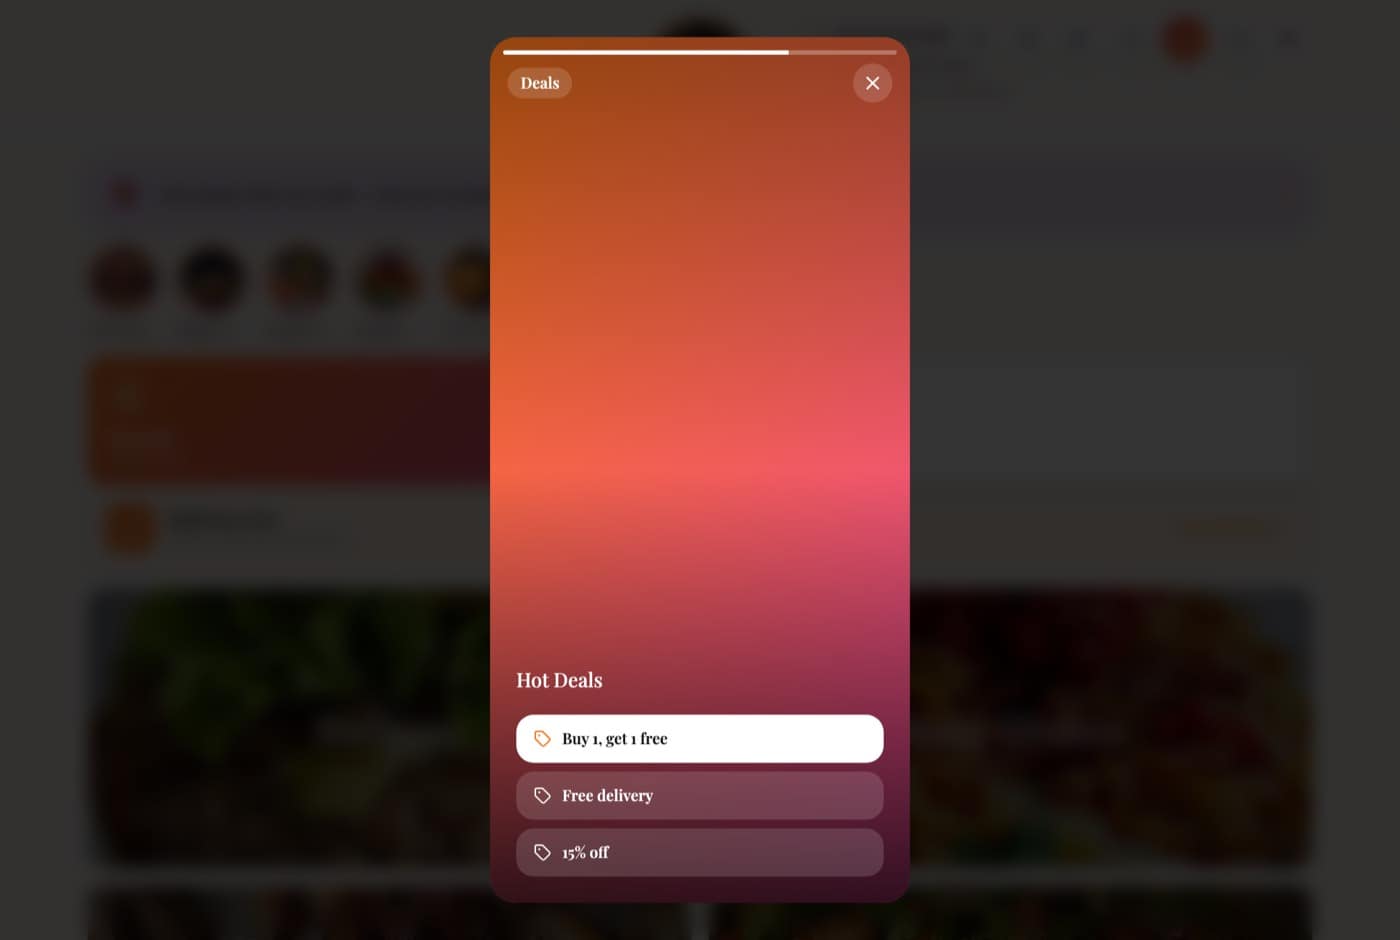
These are the same offers you create in /dashboard/offers.
Share menu copies the link; group order opens a shared basket where everyone adds from their own phone and their name shows on the order.
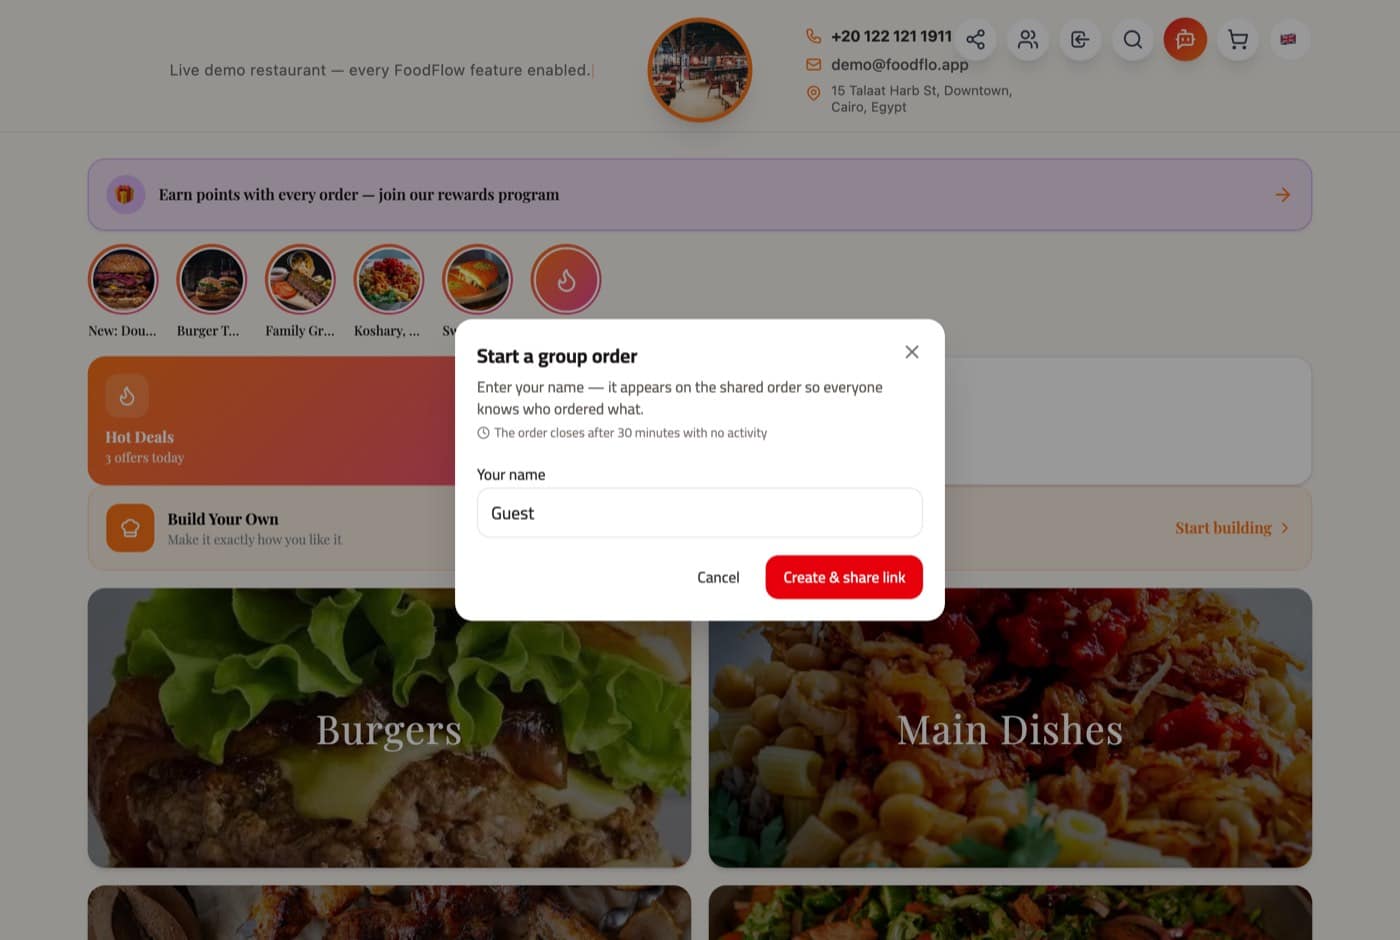
A group order closes itself after 30 minutes of no activity.
The Reserve a table card opens a booking form with no order attached — the request lands in /dashboard/reservations.
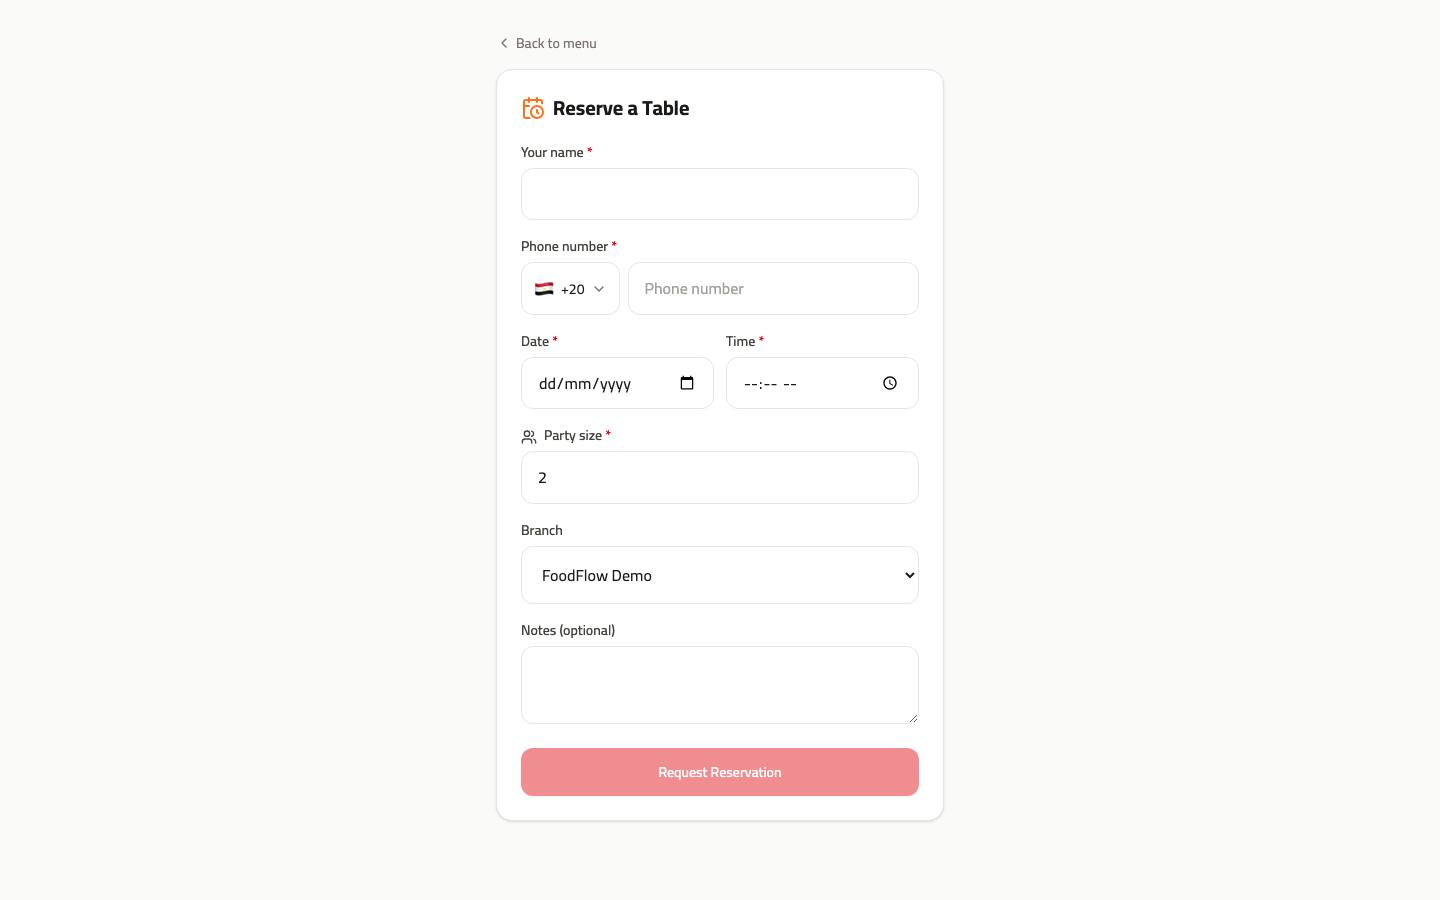
With more than one branch, the customer picks the branch right in the form.
An item opens with its photo, description, price and an Add to Order button — plus any add-ons and options you configured.
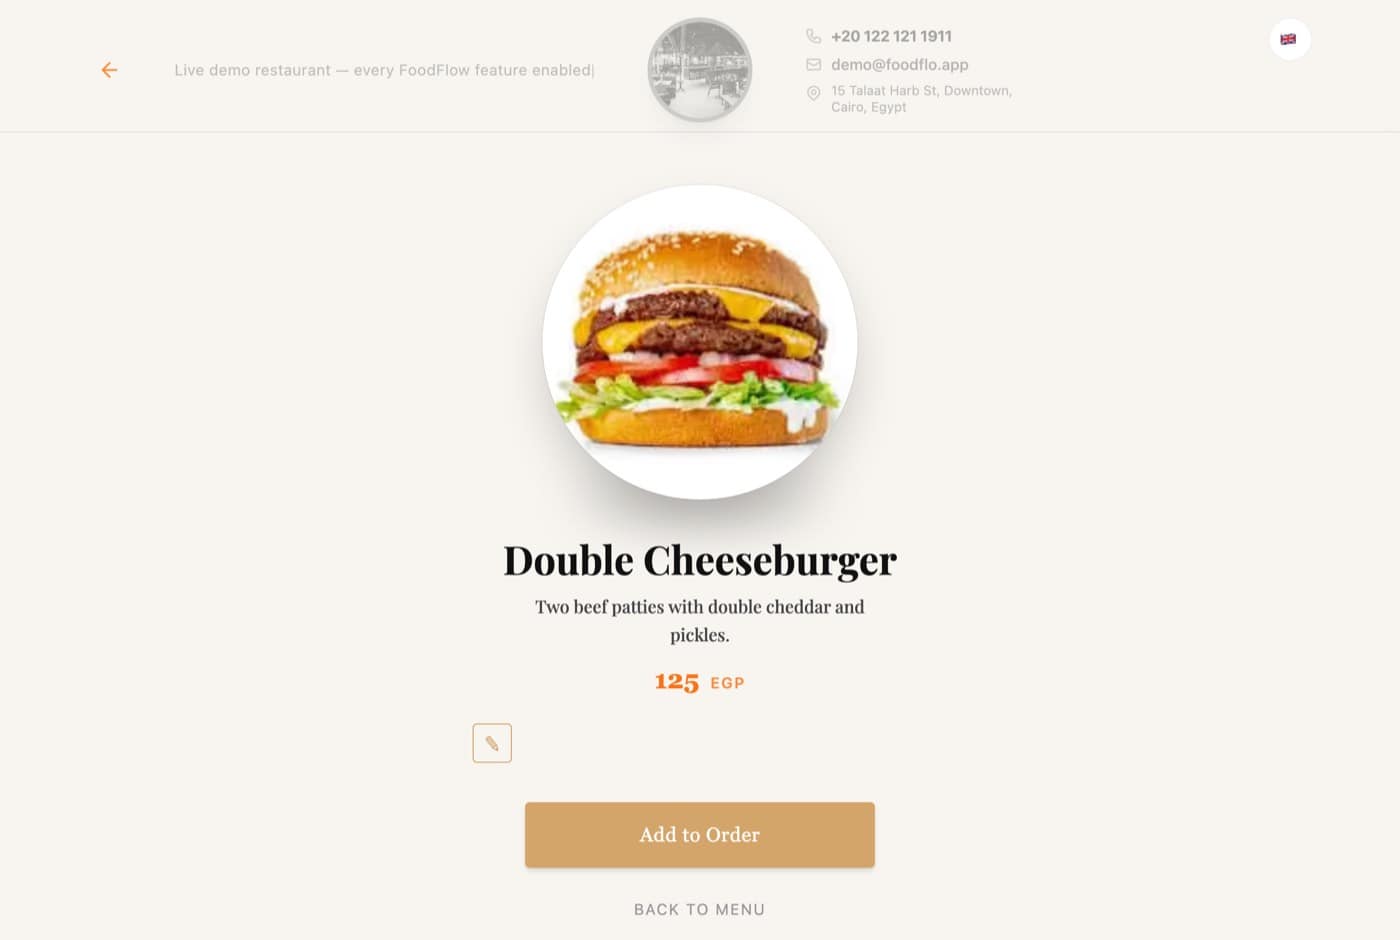
Add-ons are configured in /dashboard/customizations.
The cart slides in from the side: items, a You might also like upsell, and a fully itemised total — tax and delivery included.
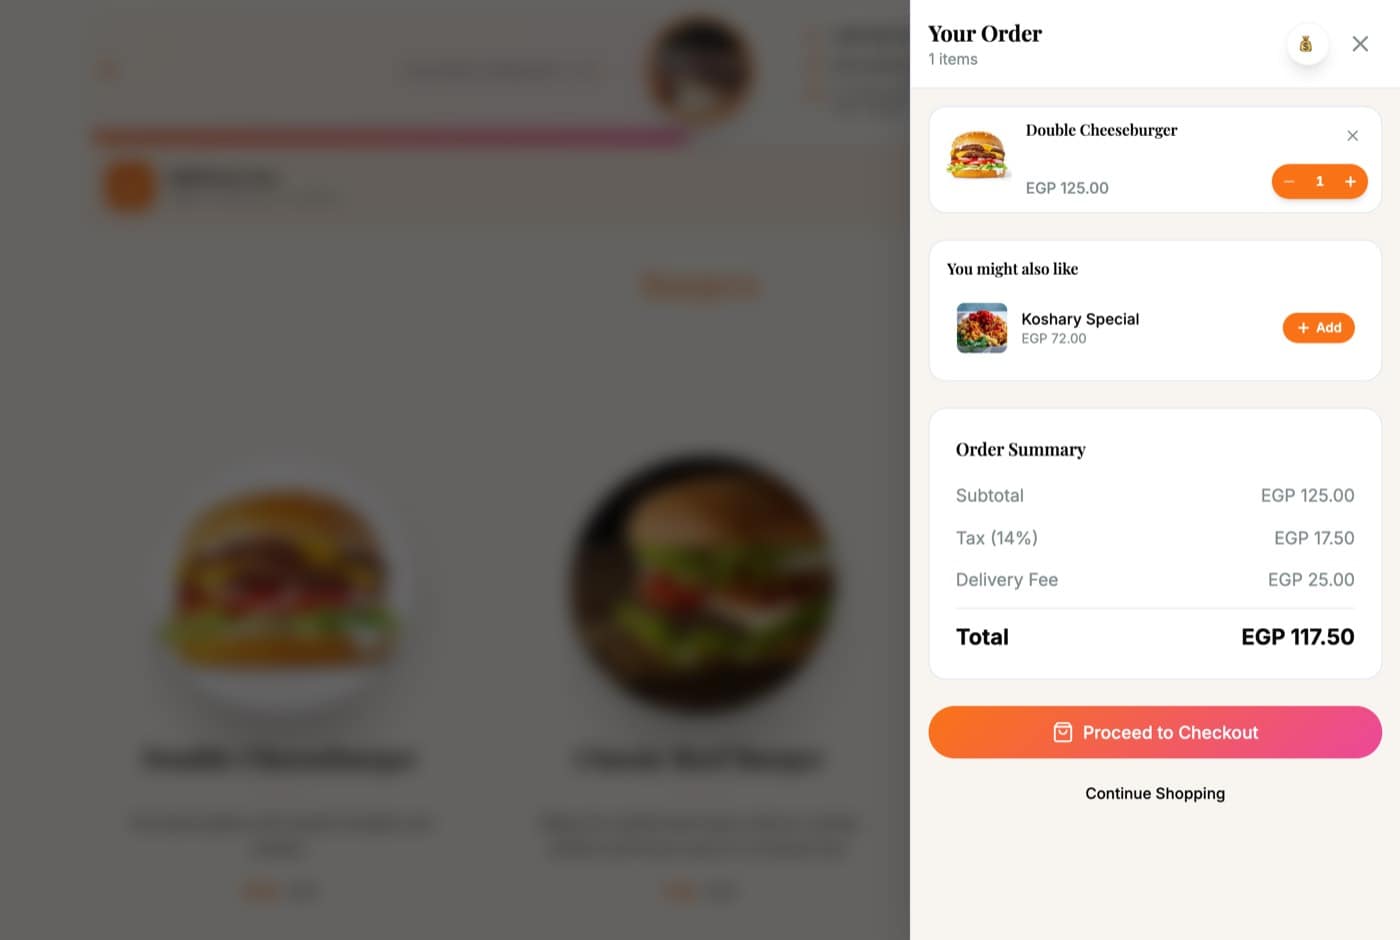
The upsell suggestions are picked automatically from past orders. 11. Checkout: delivery or pickup, customer details, a promo-code field, and loyalty points — all on one screen.
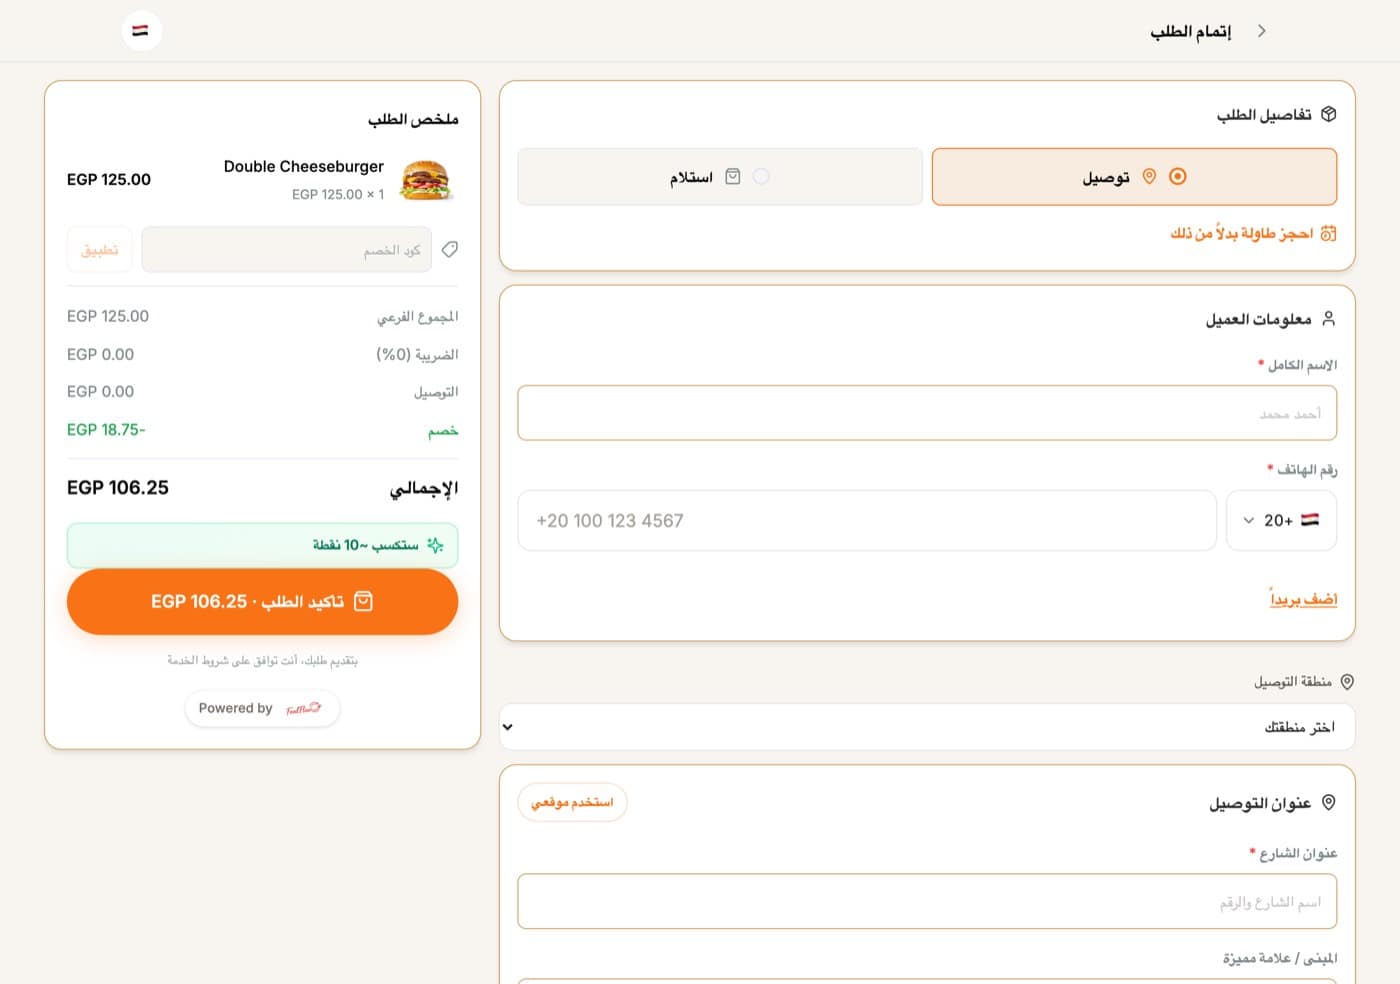
Note the “reserve a table instead” link — the same page can turn into a booking. 12. And all of it works the same on a phone — which is what 90% of your customers will actually see.
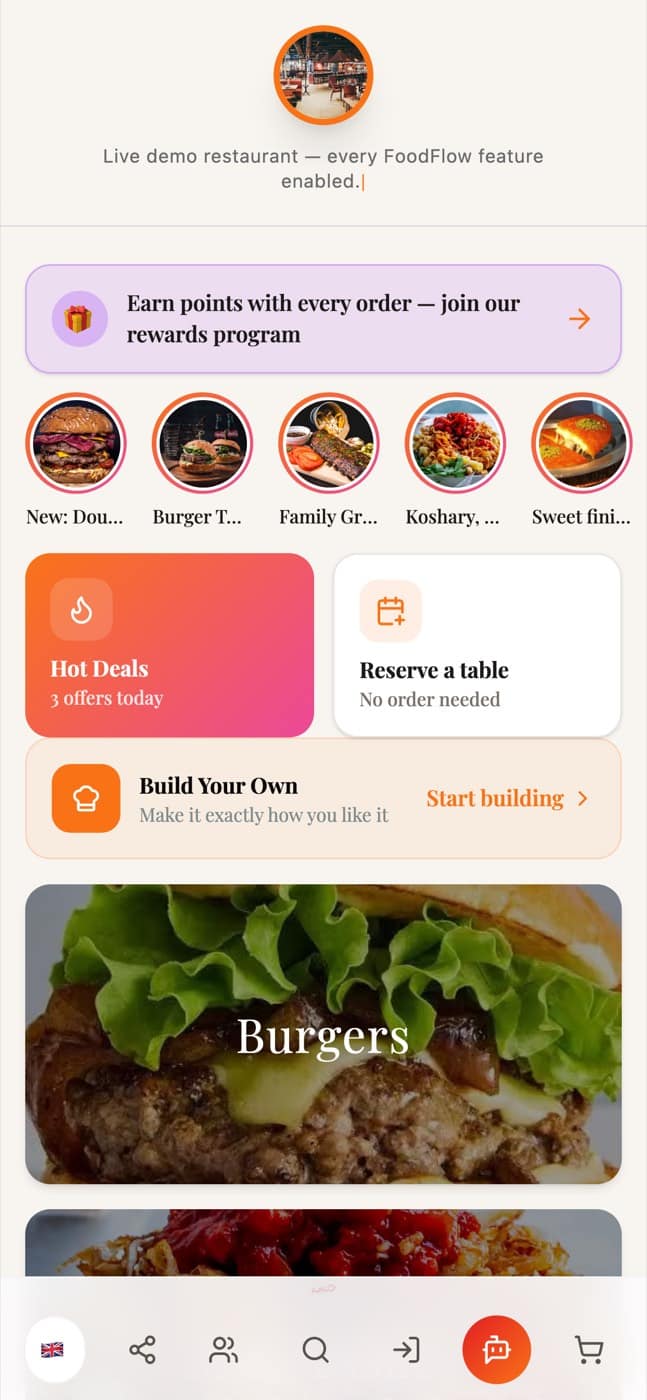
No app to install — it’s just one link.
Try it yourself
Before you share the link, open it on your phone and place a test order — you will see it arrive in /dashboard/orders the same second.
6.Branches and team
Who sees what, and who works where
- Add the branch
/dashboard/branches— each branch carries its own address, hours, and delivery zone. - Invite the staff member
/dashboard/staff— by email. They get a link to activate their account. - Set the role and permissions
/dashboard/roles— a cashier sees orders, a chef sees the kitchen, a manager sees the numbers. Without a role, nobody gets in. - Lay out the floor
/dashboard/floor-plan— tables and their numbers. This is what makes Waiter Mode and Reservations work.
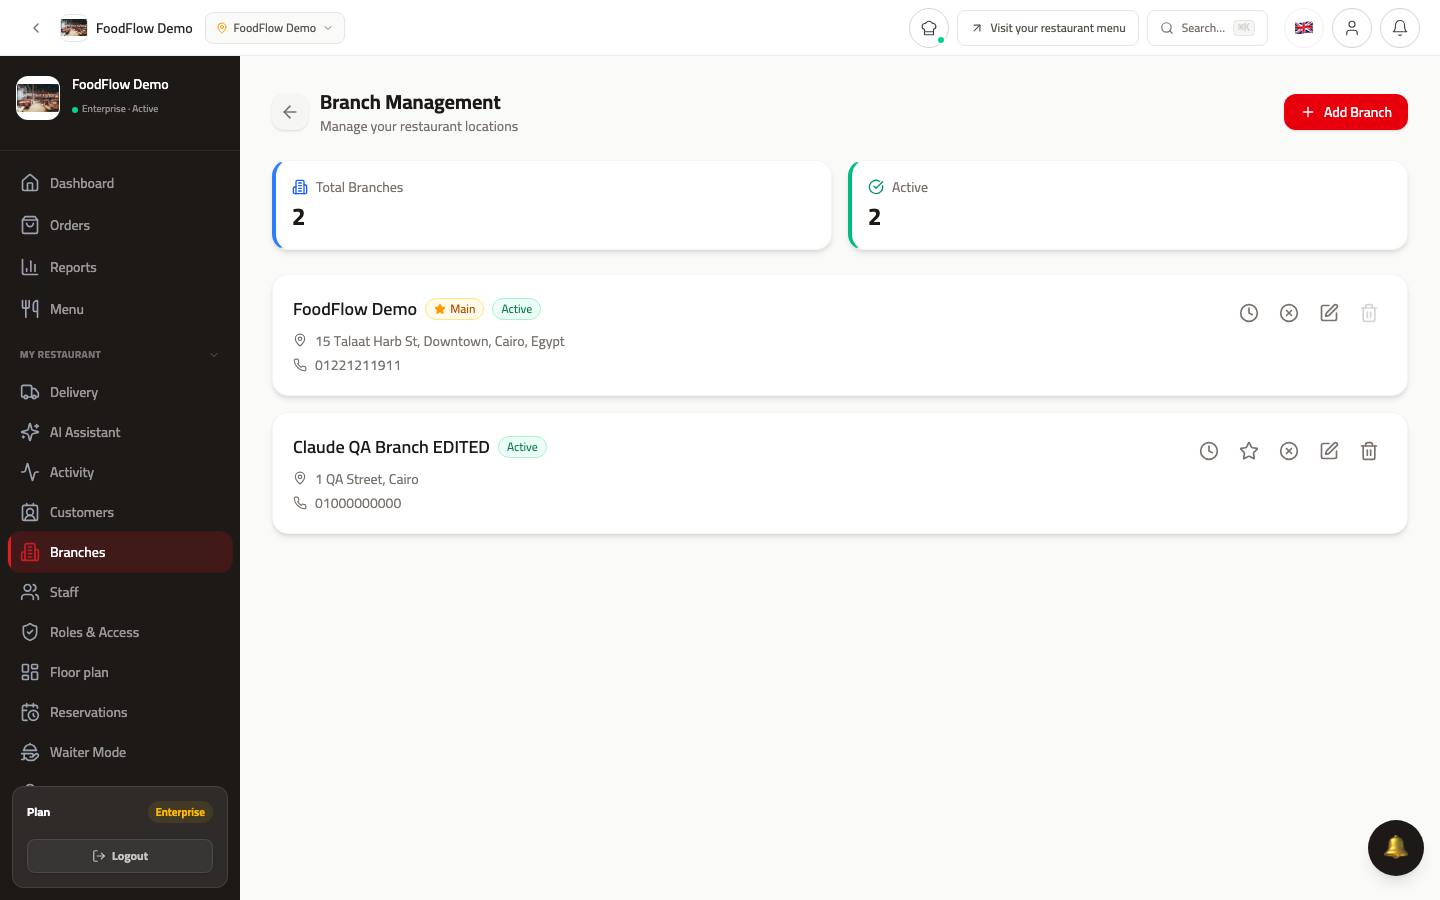
Branches: each one with its own hours and delivery zone.
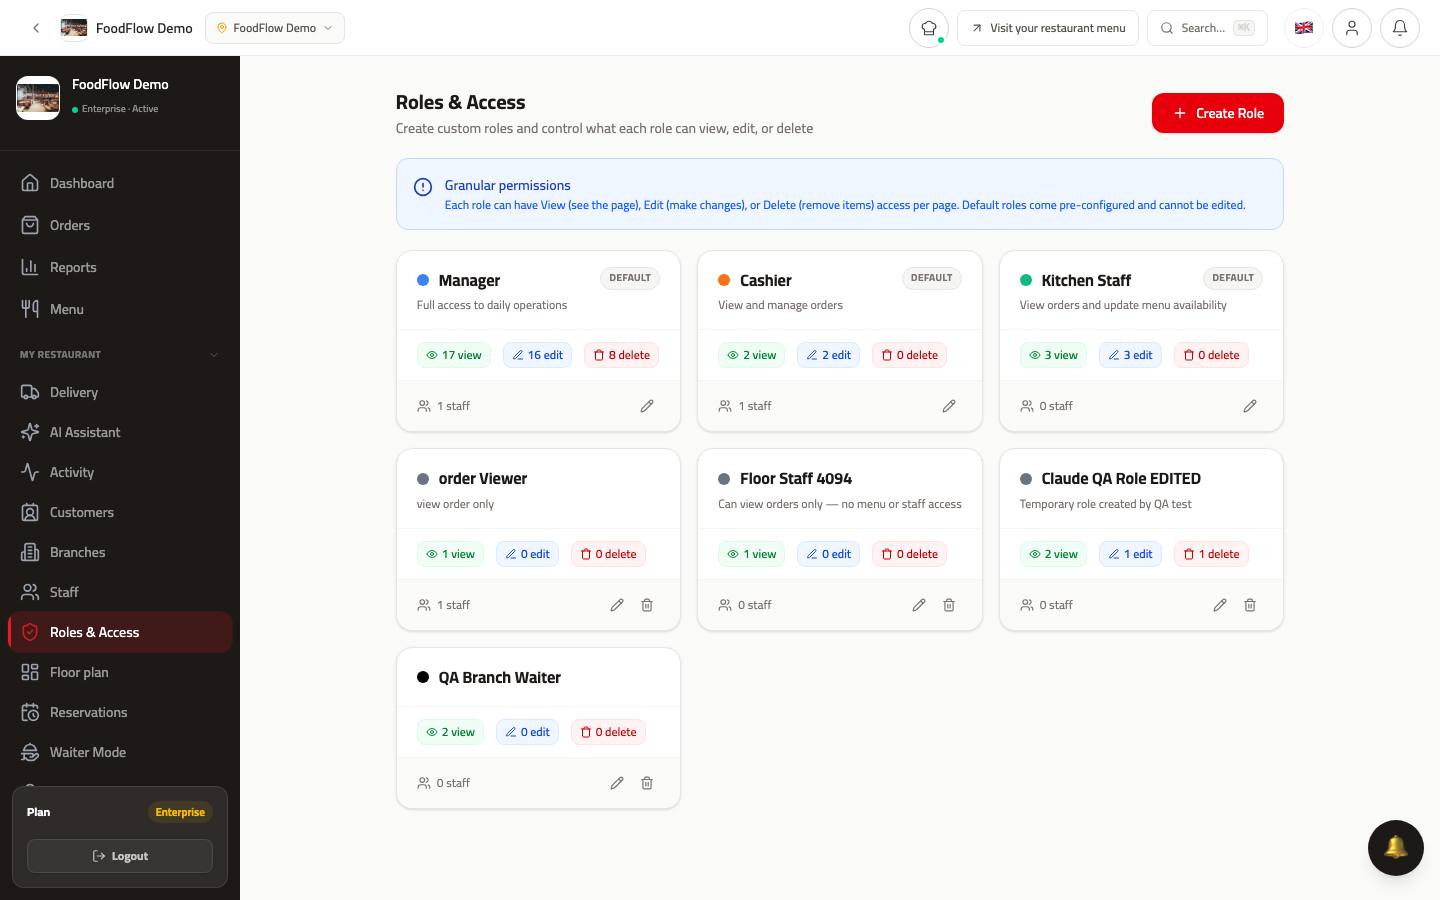
Roles & Access: every staff member gets a role, and the role decides what they see.
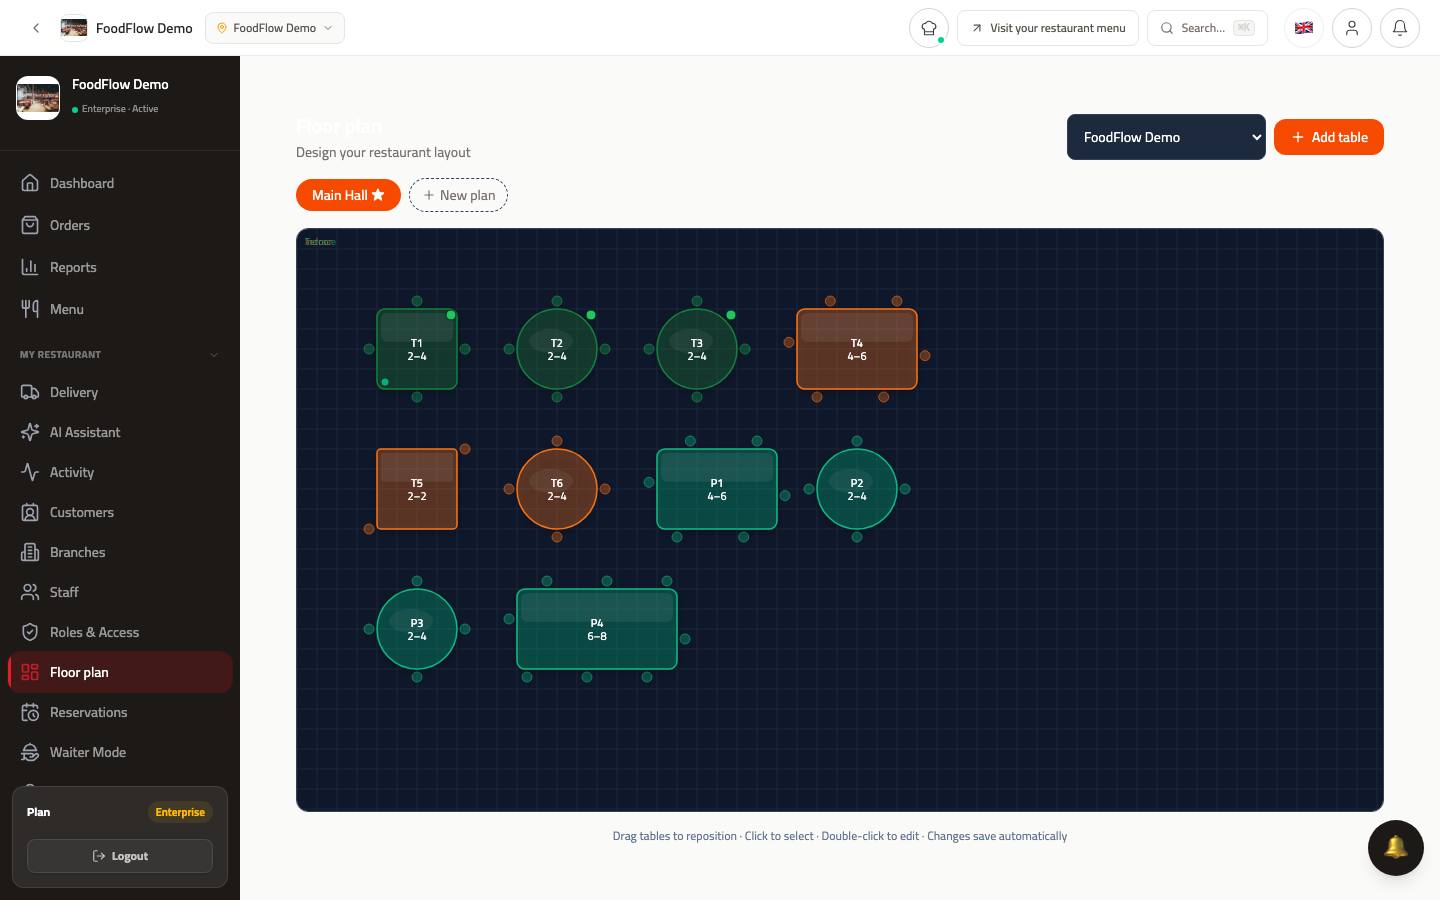
The floor-plan editor — draw your tables once and you’re done.
7.Ask your restaurant
The ask bar at the top of your home screen — it answers with your own numbers and does what you ask
The first thing on your home screen is a bar that says “Ask me anything about your business”. It is not a generic chatbot: the assistant can see your actual data — orders, sales, menu, stock — so it answers from your own numbers, and when you ask it to change something it makes the change in the dashboard itself.
Open Dashboard. The ask bar sits right at the top, with ready-made chips beside it: open orders, unpublished draft, top sellers, create an offer.
Those chips change on their own depending on what your restaurant needs right now.
Type a real question — “How much did I sell today?” — and the bar expands into a full assistant inside the same page. The answer comes back with your numbers and a chart, not generic advice.
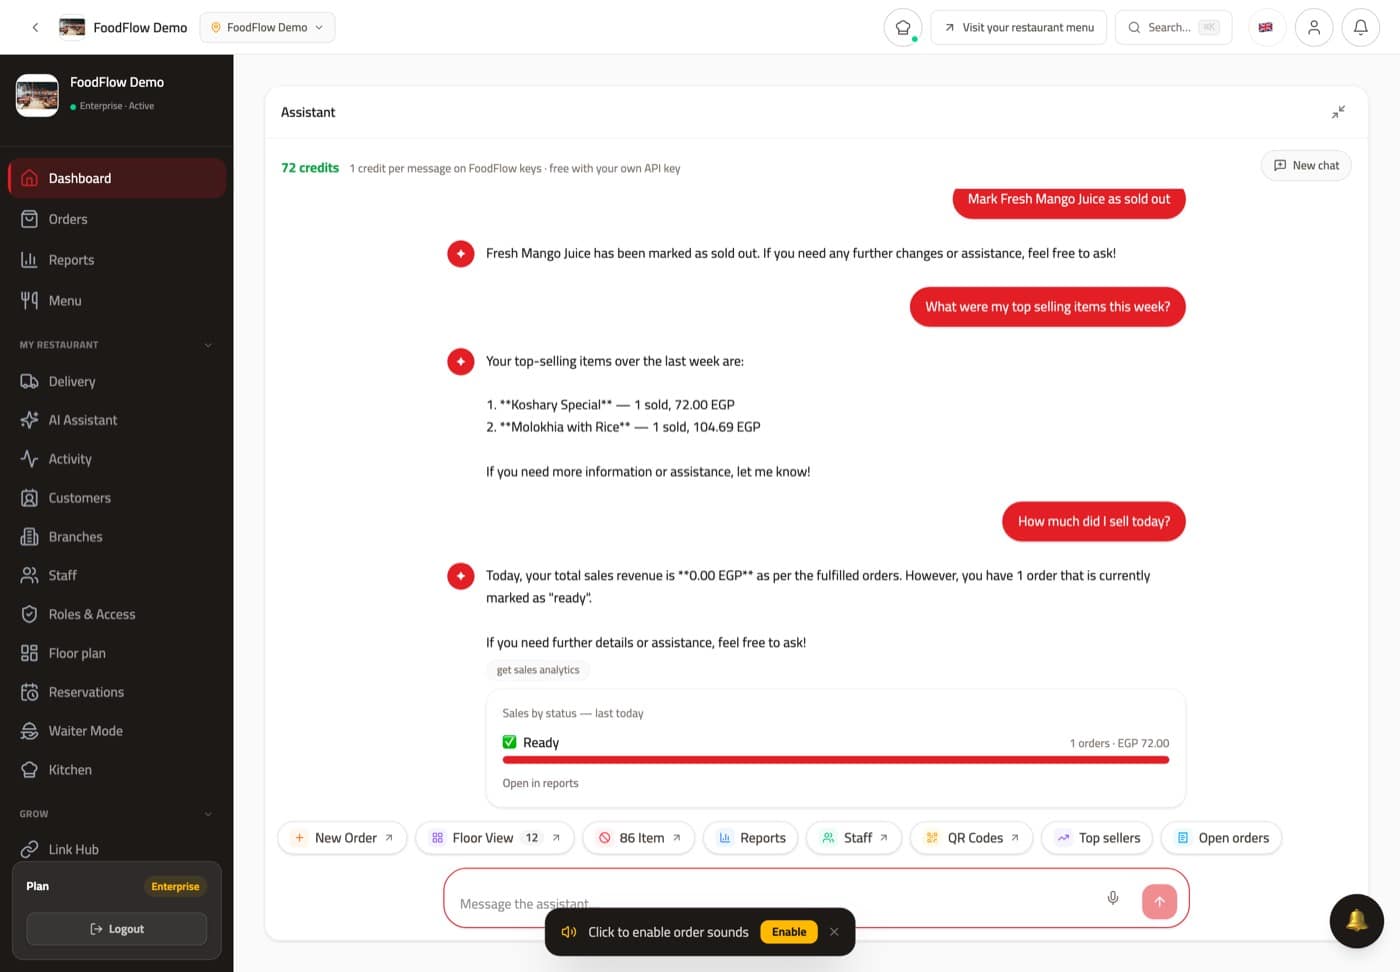
Under the answer sit quick actions: new order, floor view, 86 an item, reports, staff, QR codes.
You can also ask it to act: “Mark Fresh Mango Juice as sold out” — and it really does it in your menu, then confirms. For longer sessions, AI Assistant in the sidebar opens the same assistant full-screen.
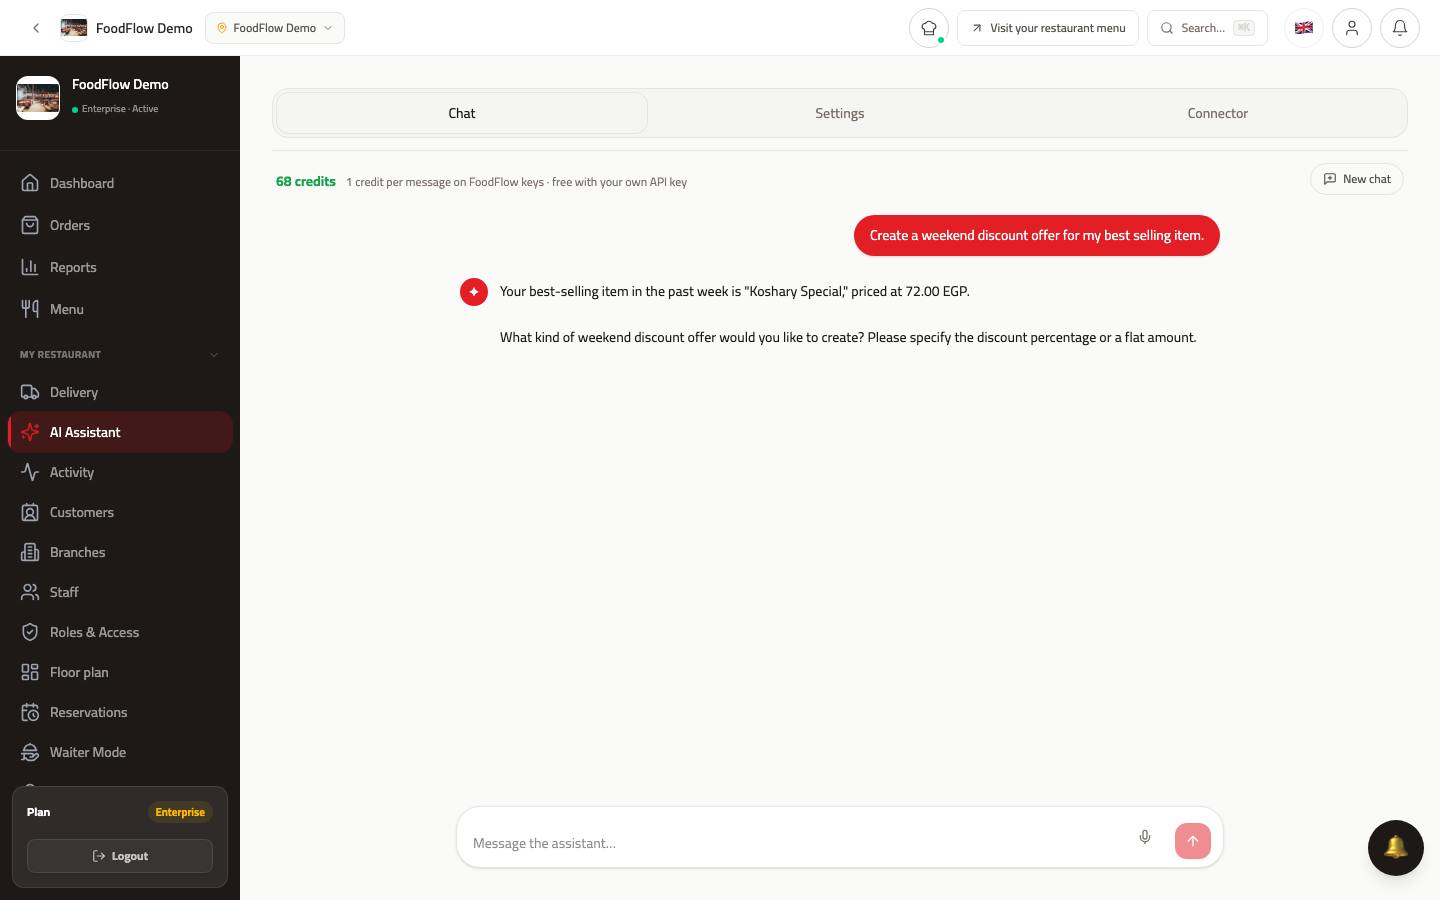
Chat to ask, Settings for the model and API key, Connector to plug it into other tools.
See it working
Answers from your data
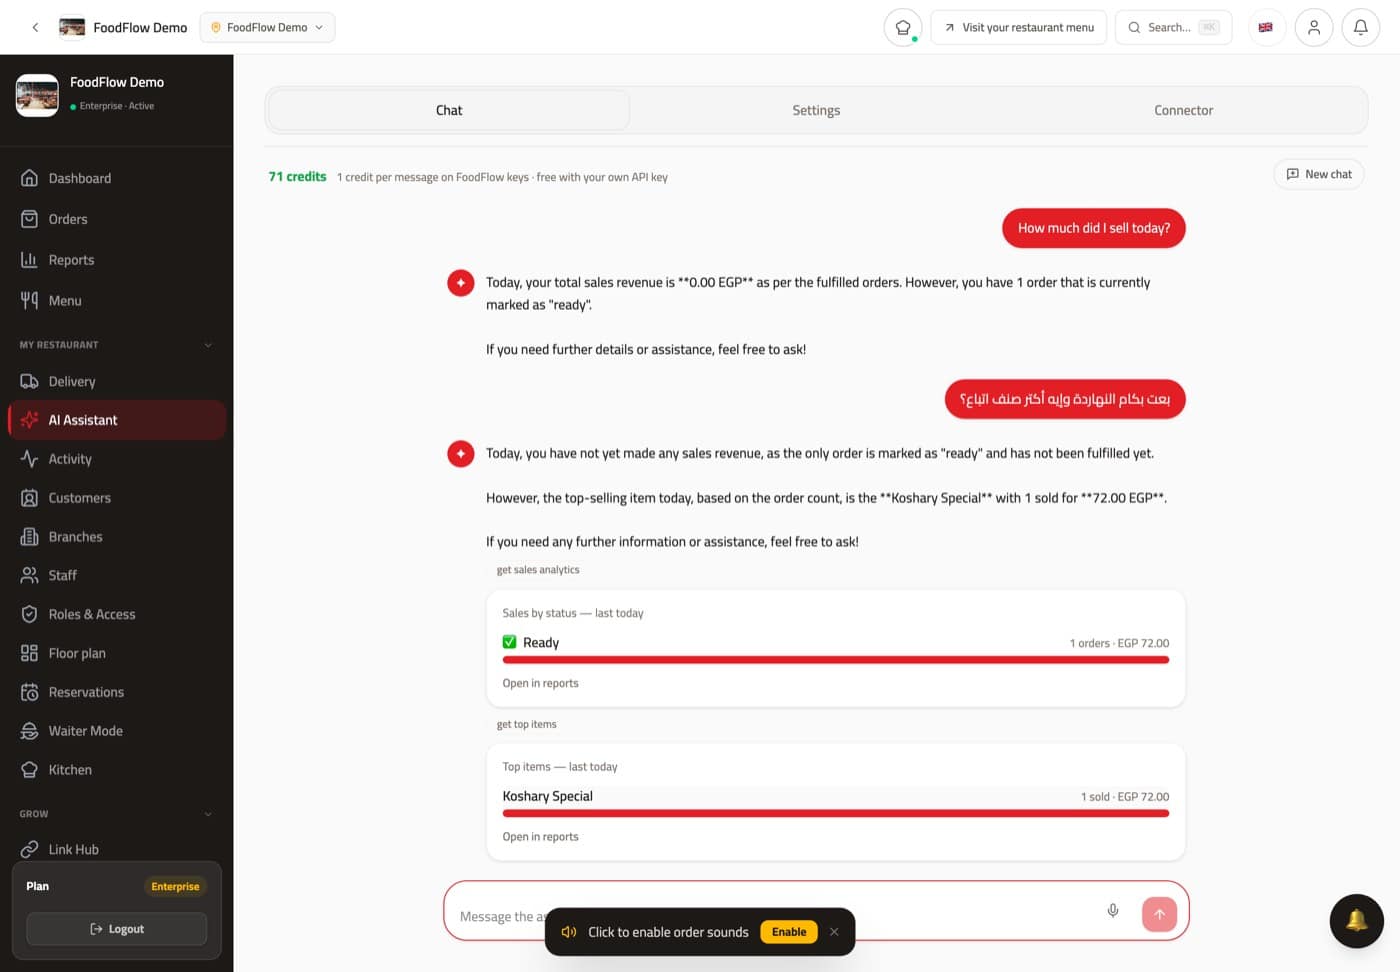
Today’s sales, best seller, average order — without opening Reports.
It acts, not just talks
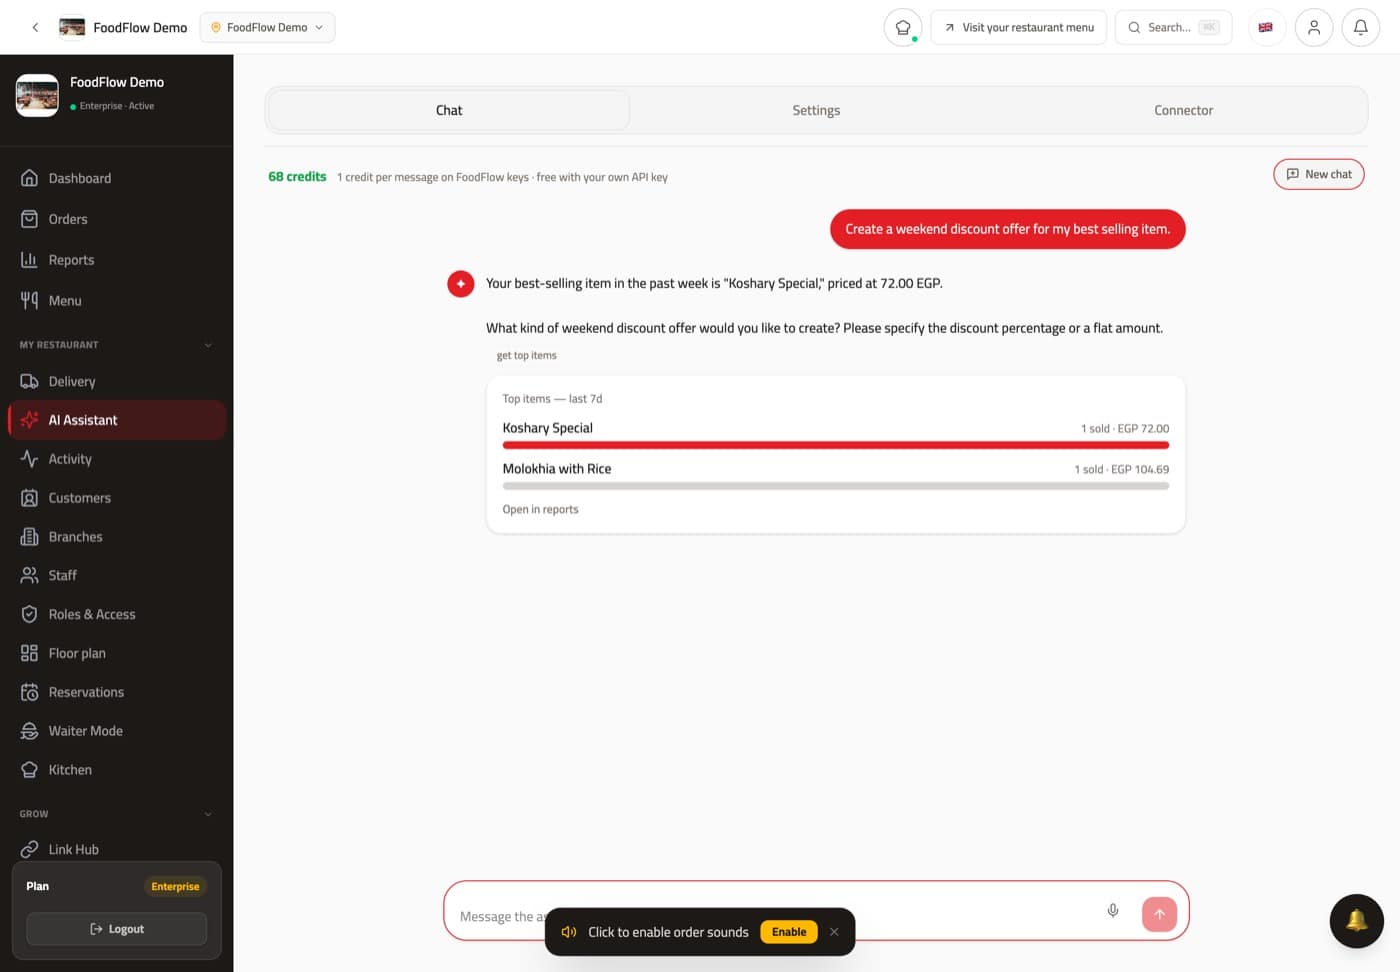
“Make a weekend discount on my best seller” — it finds the item and builds the offer with you.
It suggests, you approve
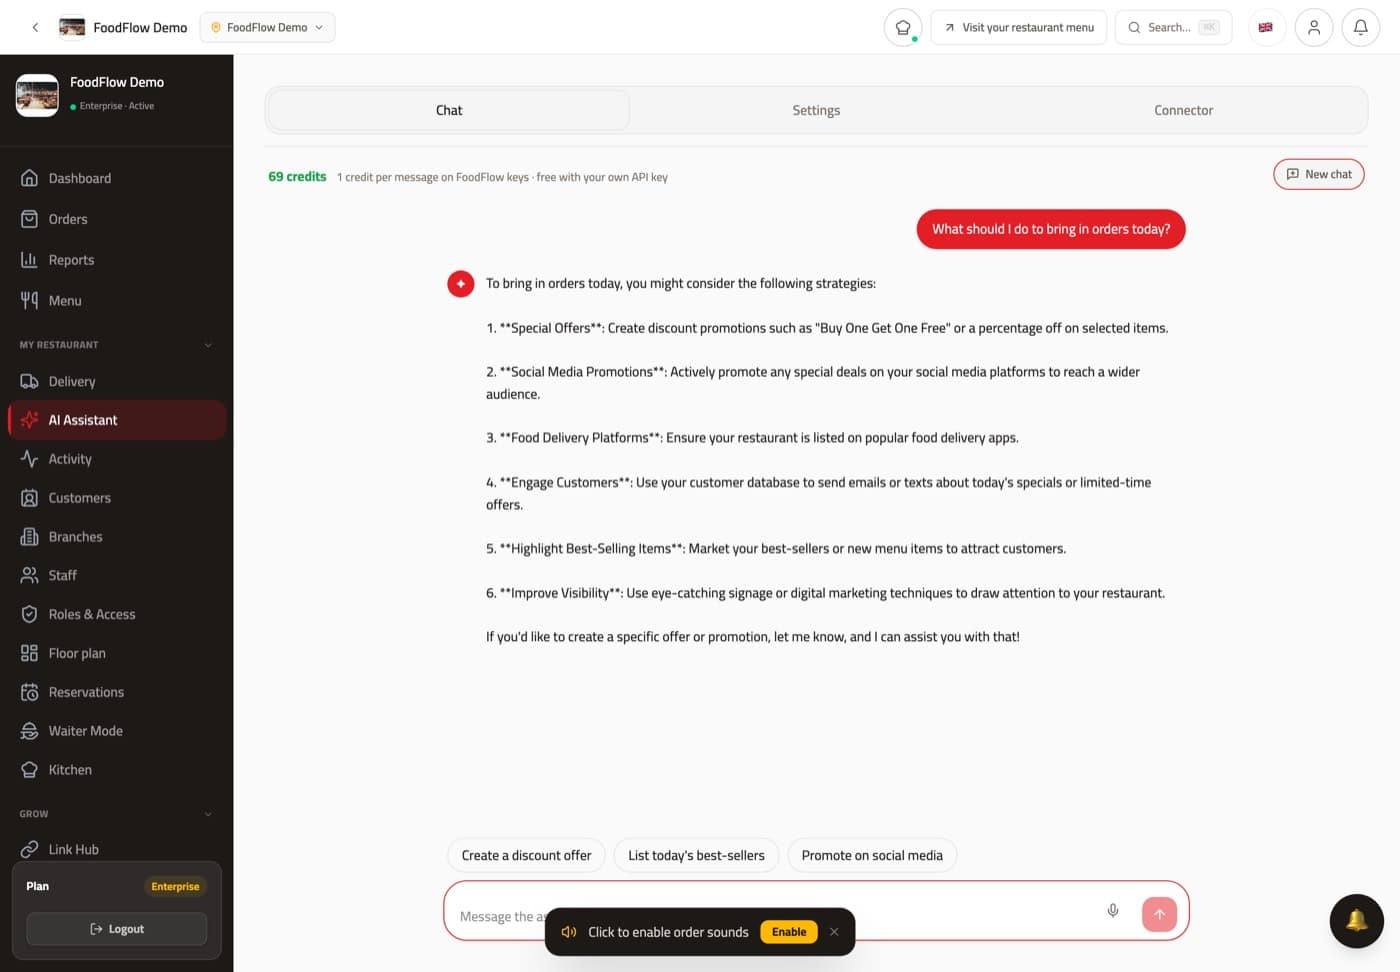
Ask “what should I do to bring in orders today?” — it reads your numbers and suggests a move you can apply.
Both languages, your key is free
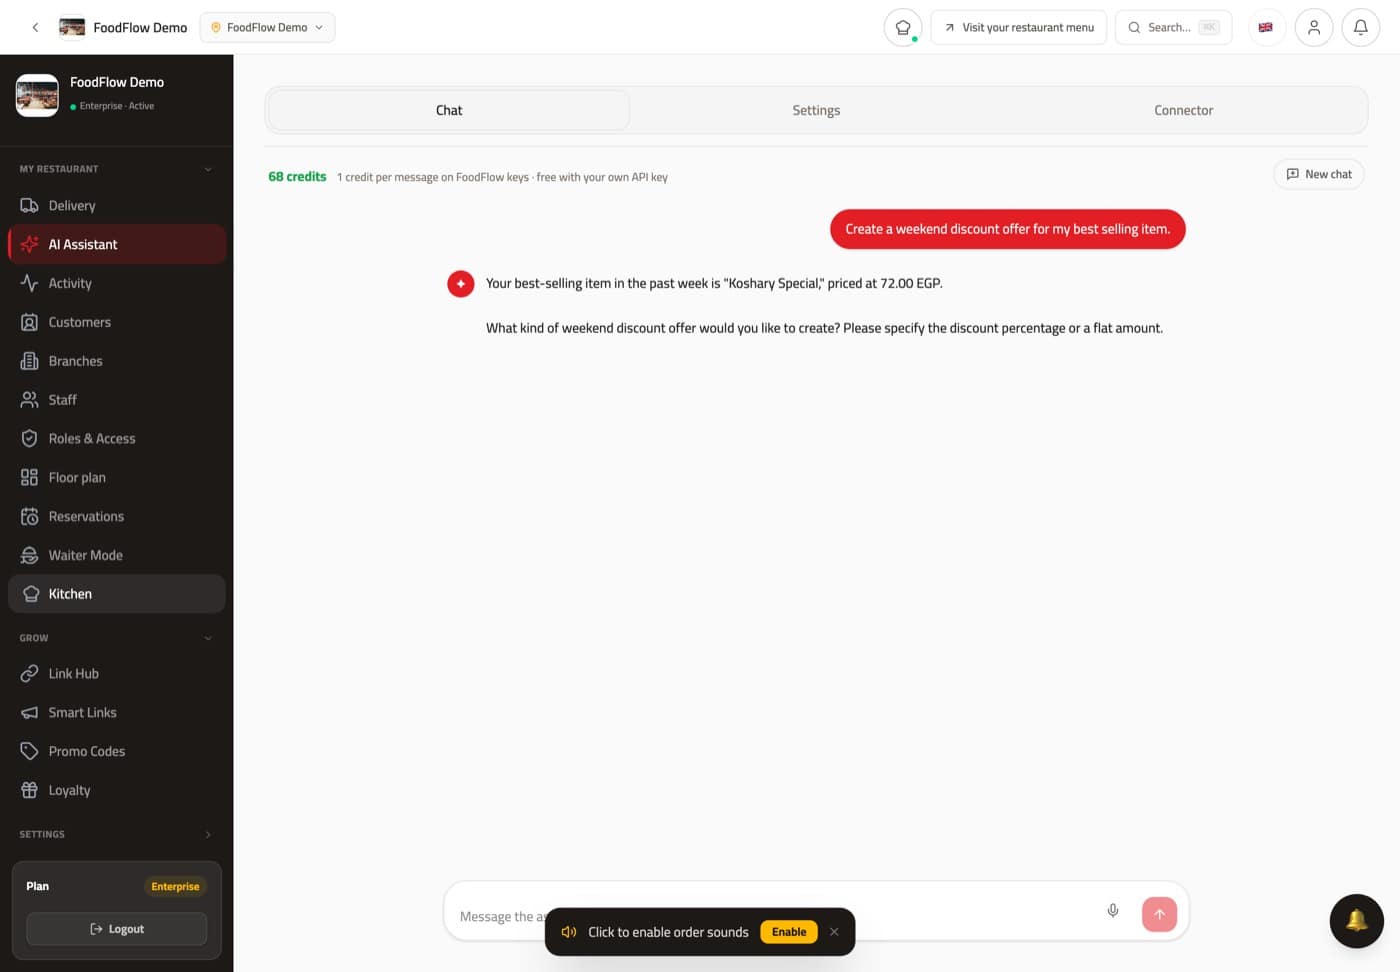
Write in Arabic or English. One credit per message on FoodFlow keys — free with your own key under Settings.
8.Growing sales
The tools that bring new orders in and bring customers back
Link Hub
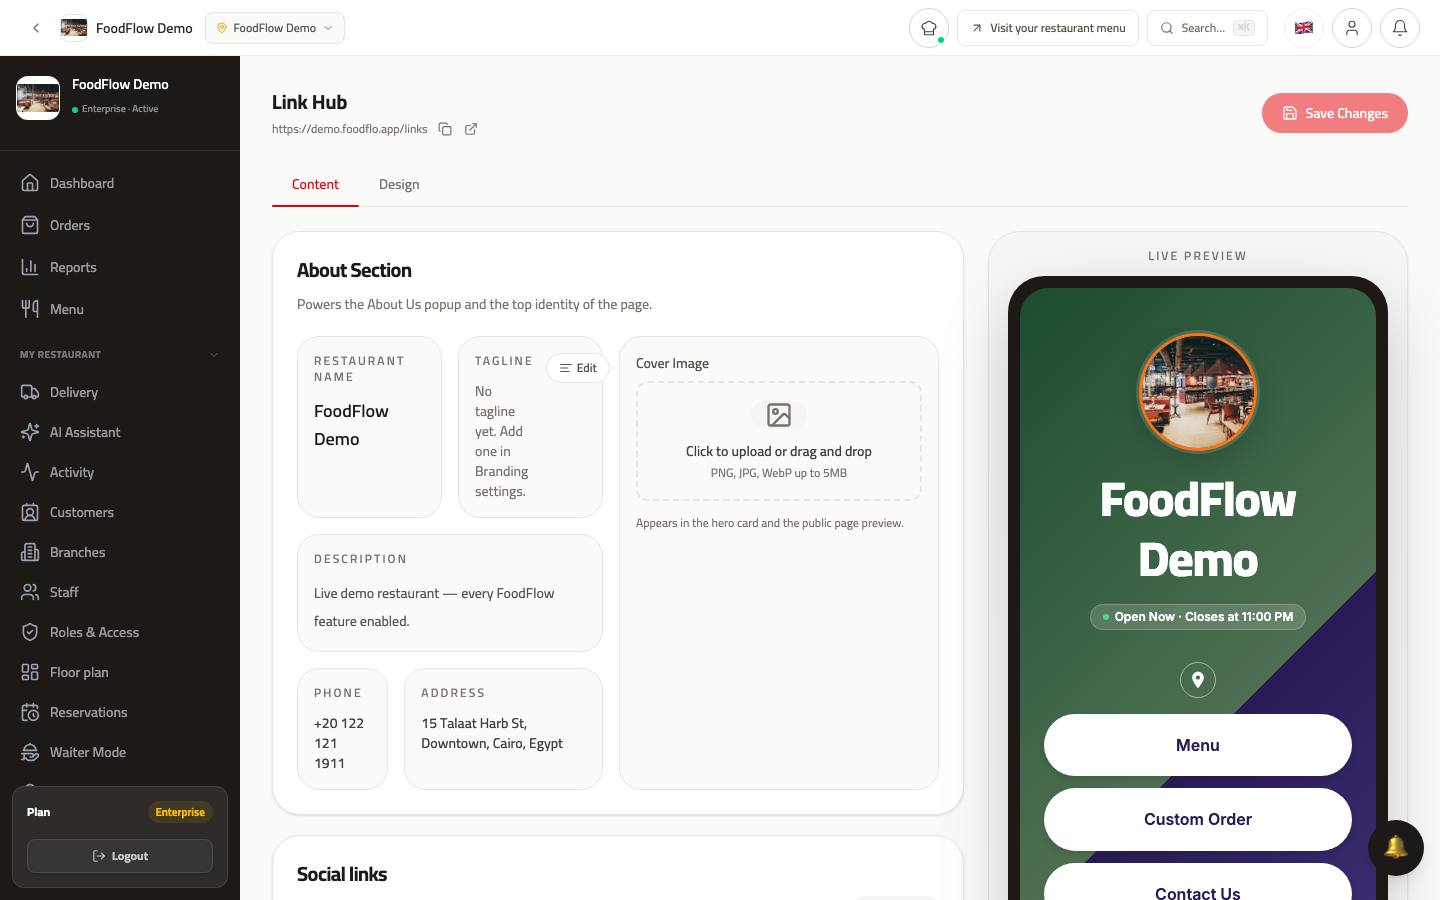
One link for your bio — menu, custom order, contact, InstaPay — with a live preview as you edit.
Smart Links
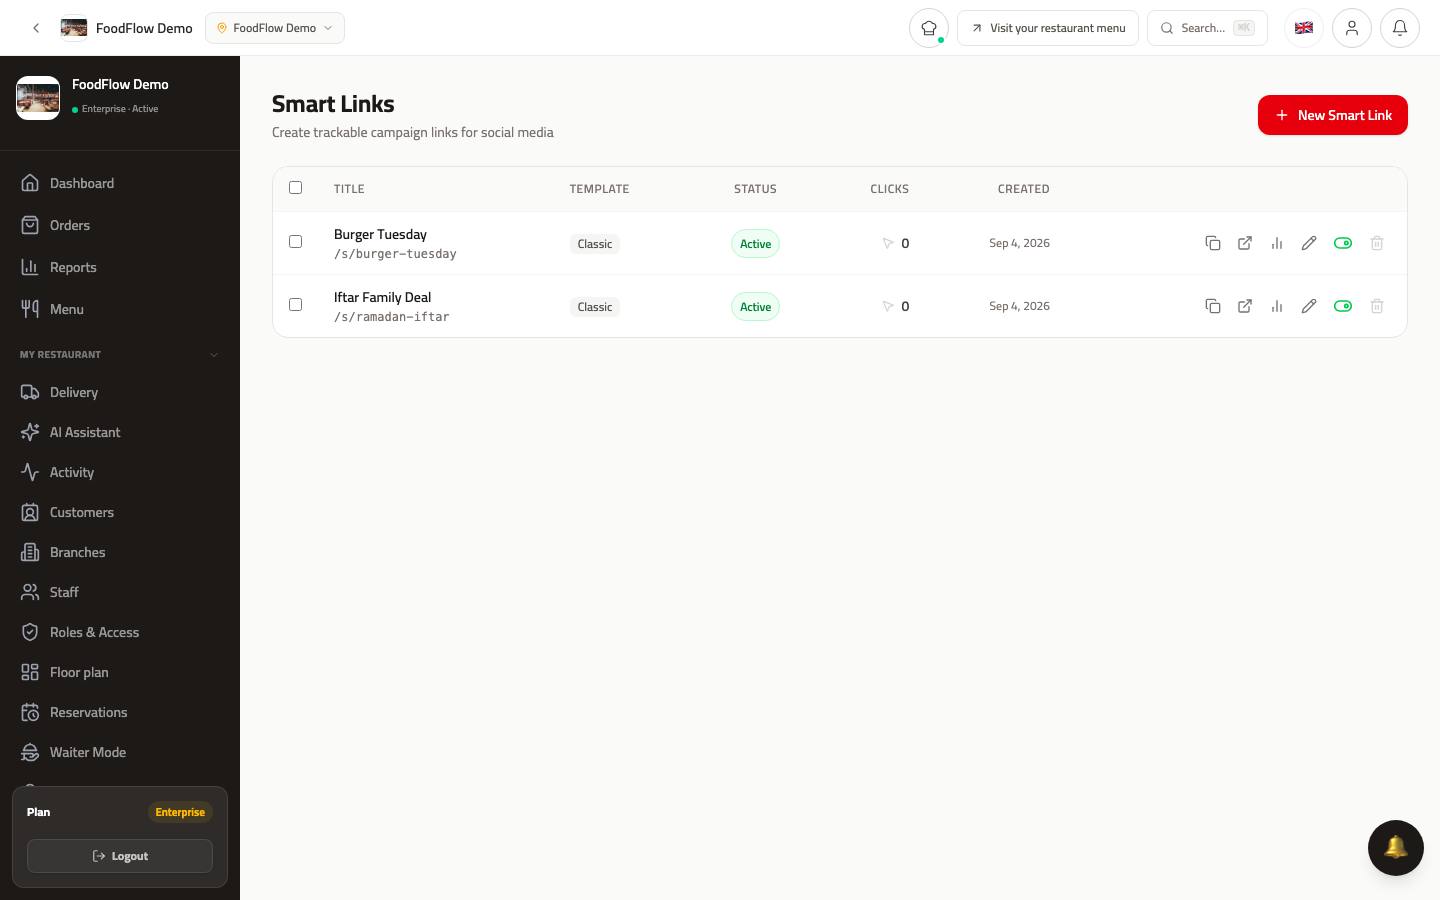
A link per campaign, so you can see which one actually brought visits and orders.
Promo Codes
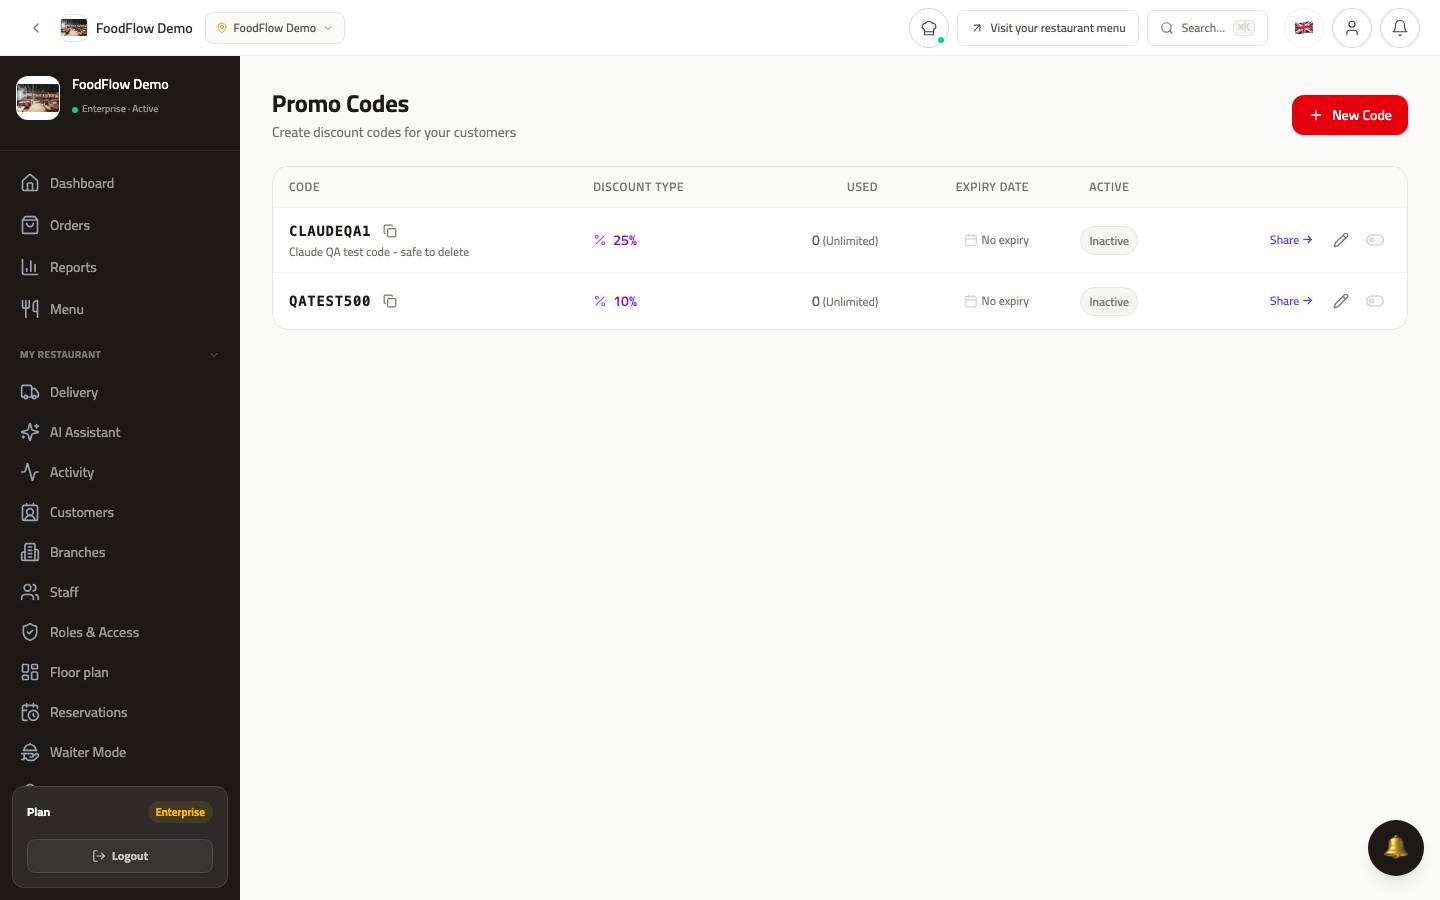
Percentage or fixed amount, with a minimum order and an expiry date.
Loyalty
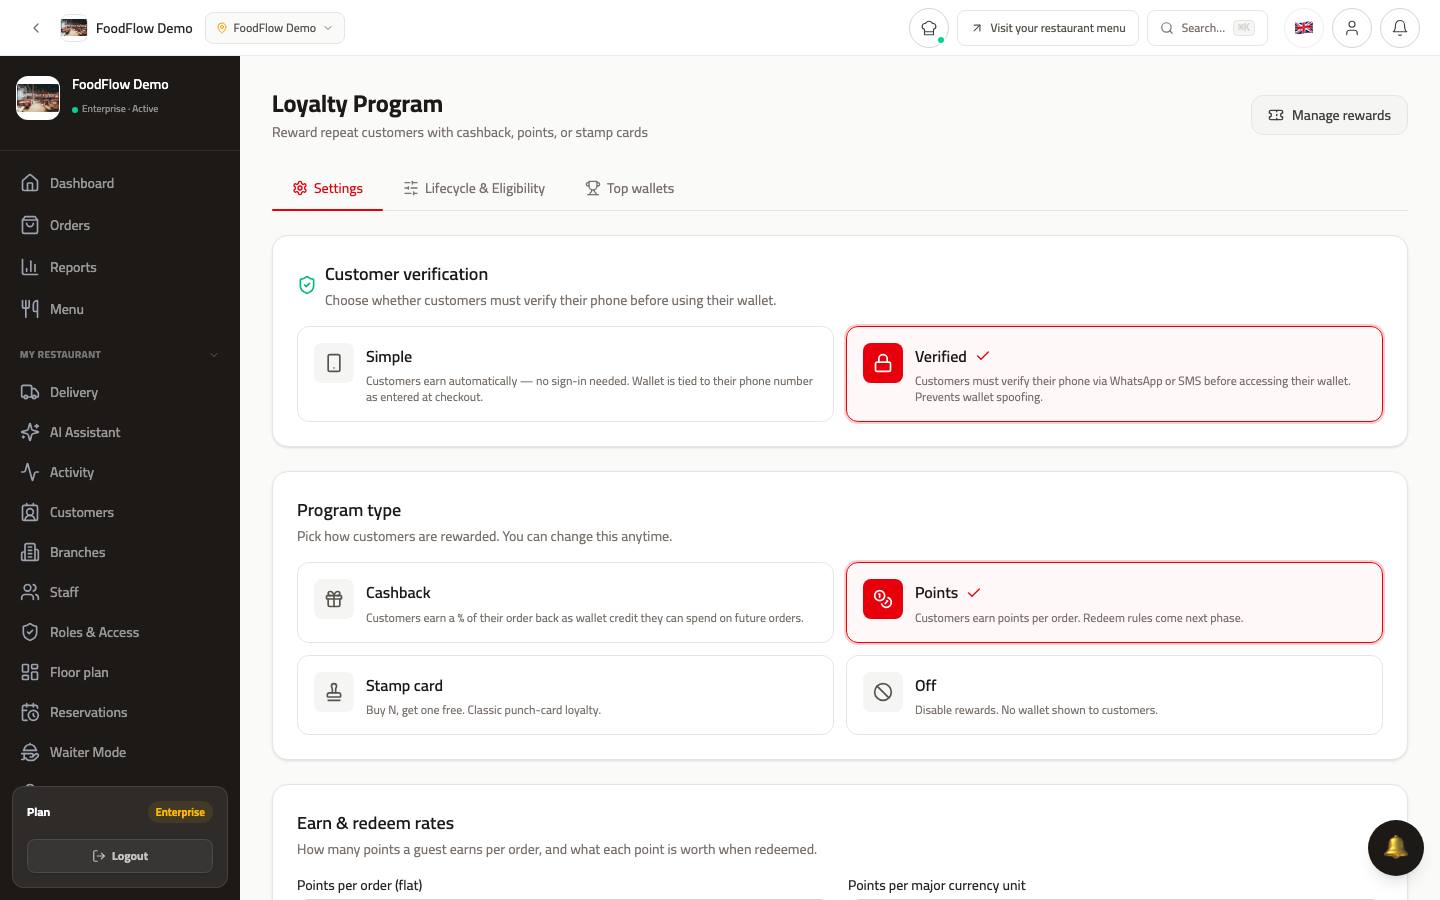
Points on every order that customers redeem for a discount.
Offers
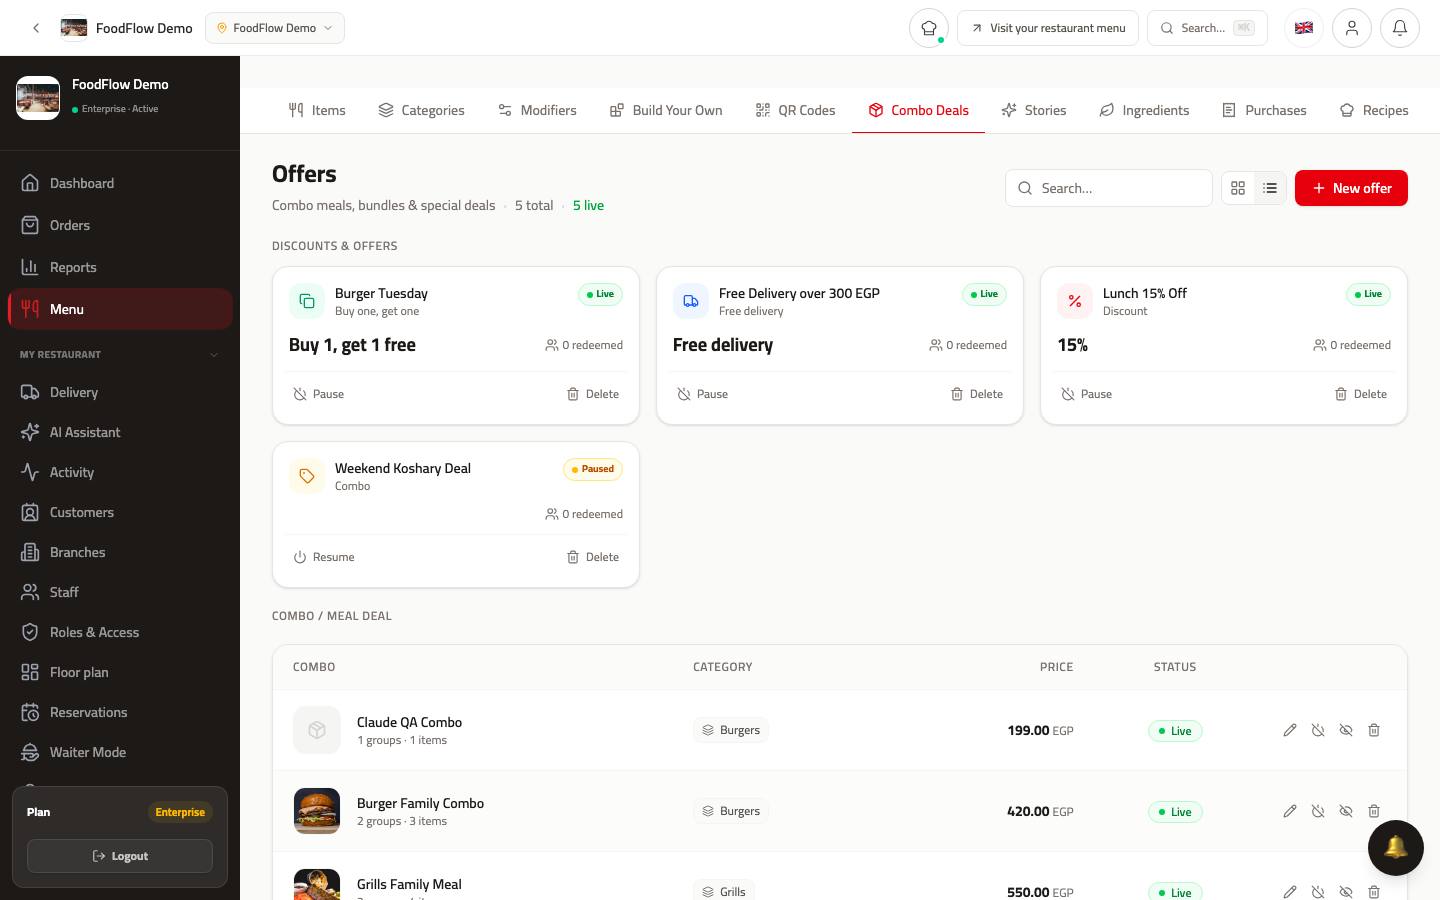
An offer on one item or the whole order, shown at the top of the menu.
QR Codes
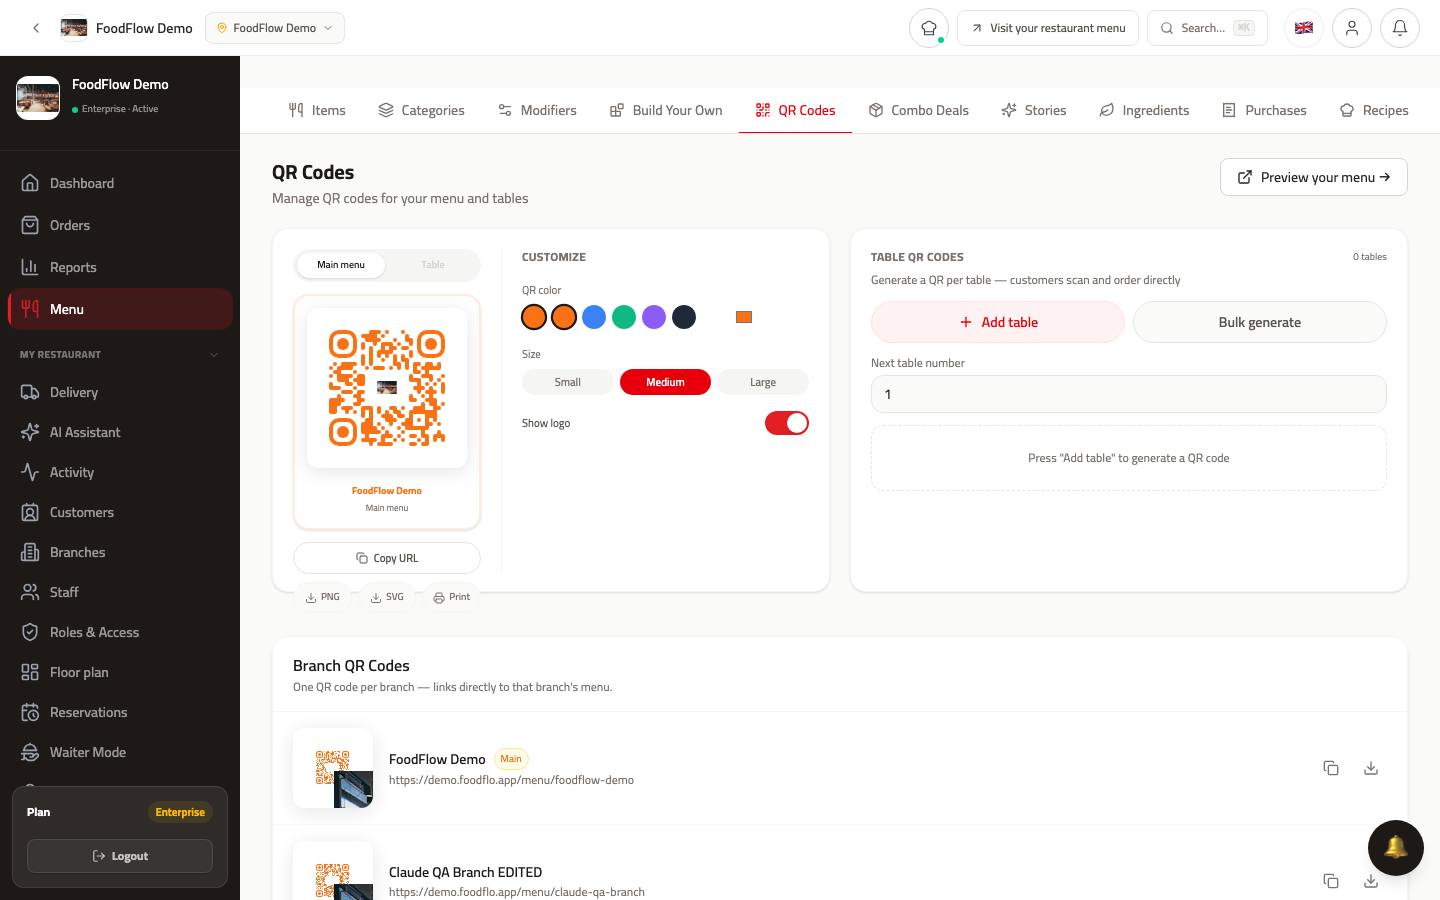
A code per table — the diner scans it and orders from their seat.
And how do you decide?
Analytics shows revenue, average order value, best sellers, and your peak hours — that is what tells you where the next offer should go.
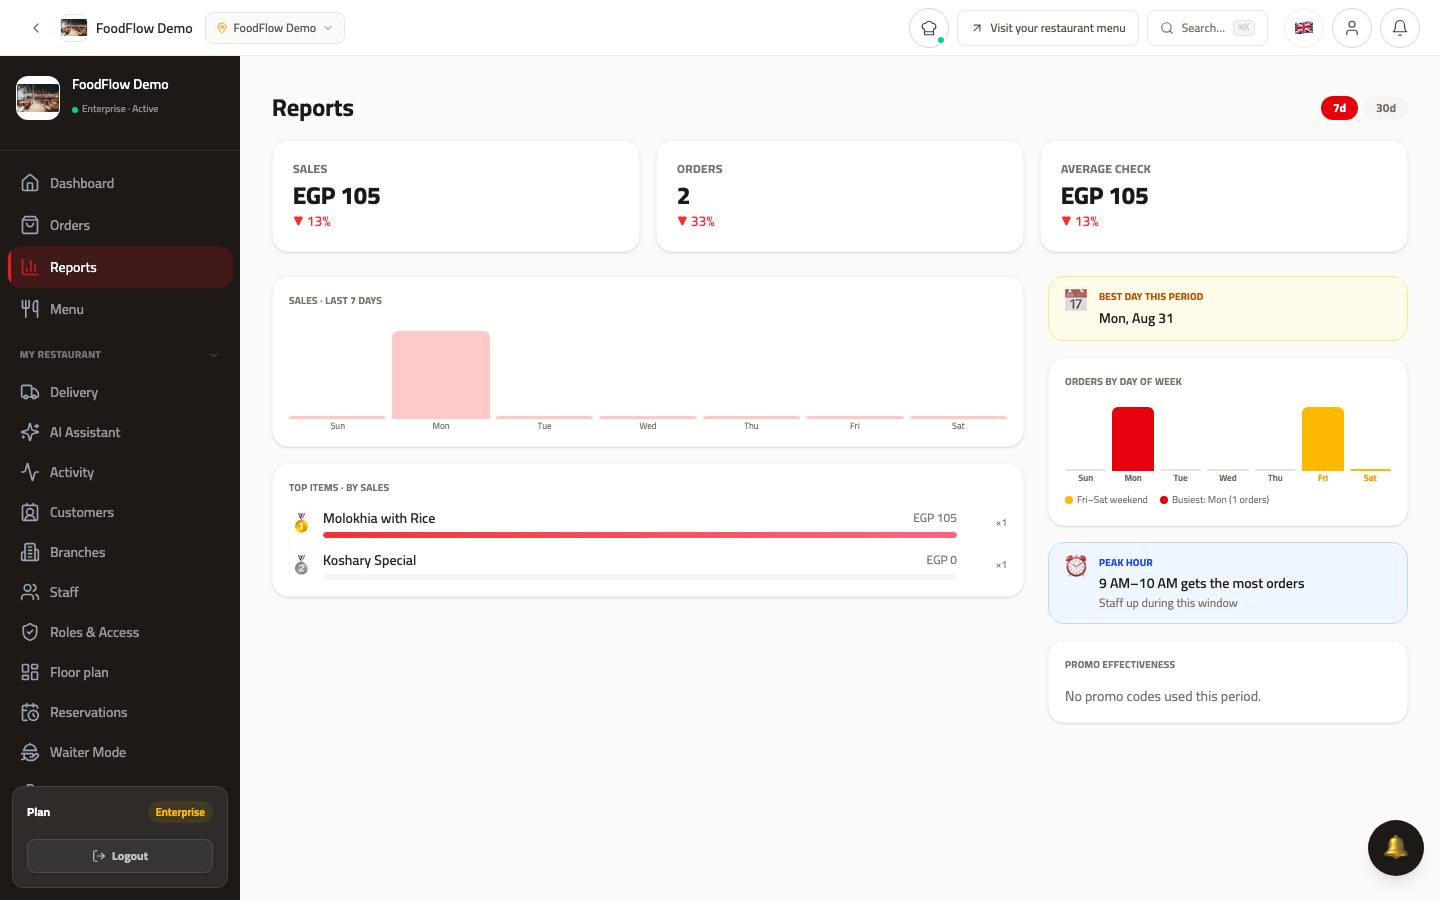
9.Settings you touch once
Payments, the bot, and integrations
Payments
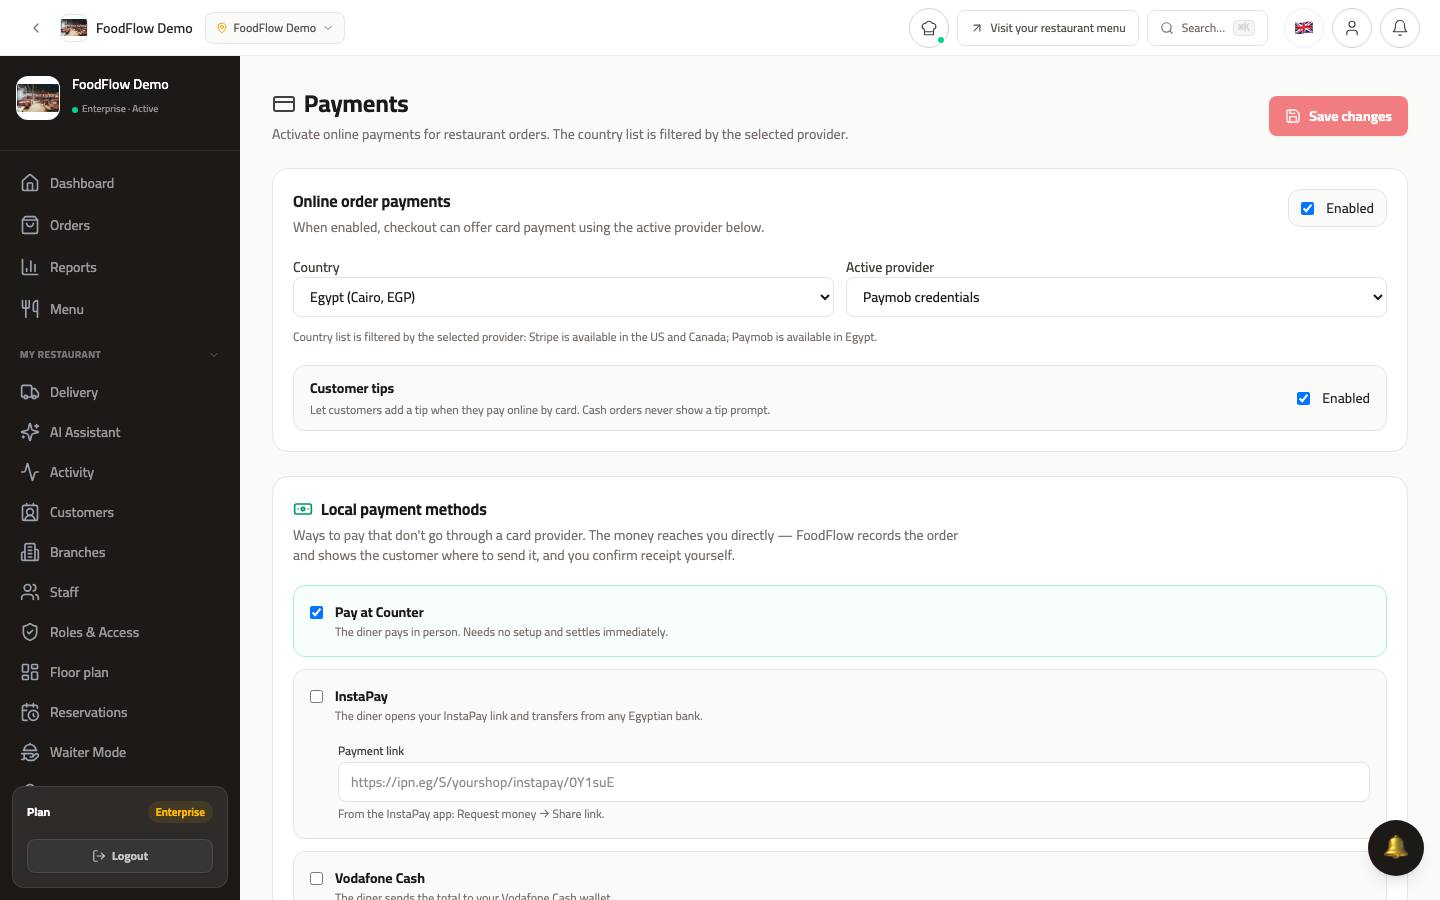
Card payments online, plus the local ways to pay: cash at the counter, InstaPay, Vodafone Cash.
Bot Settings
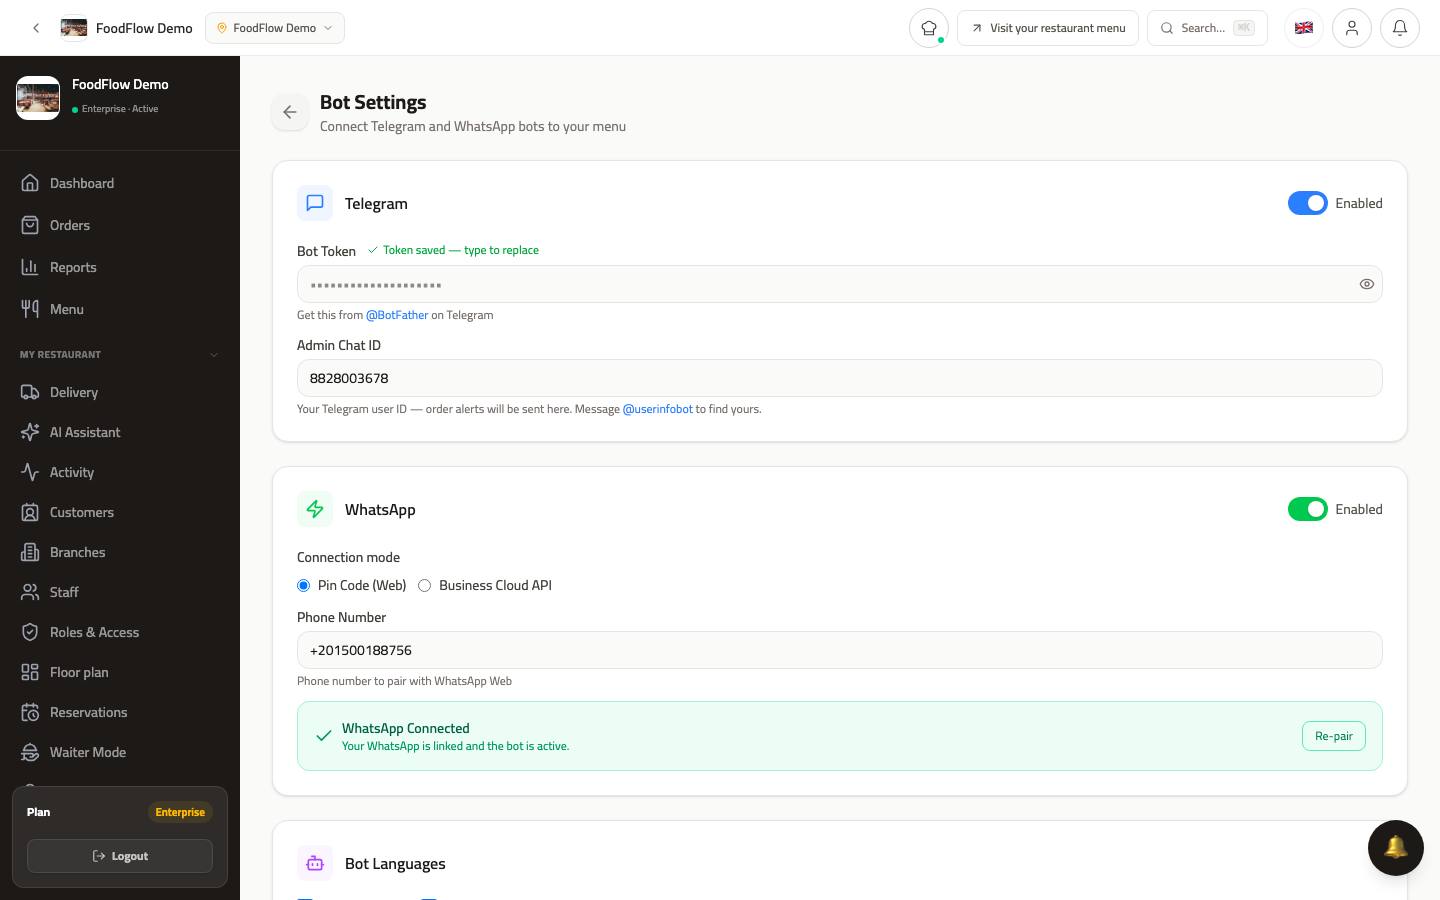
The WhatsApp bot that answers customers and takes orders — greeting message and language.
Integrations
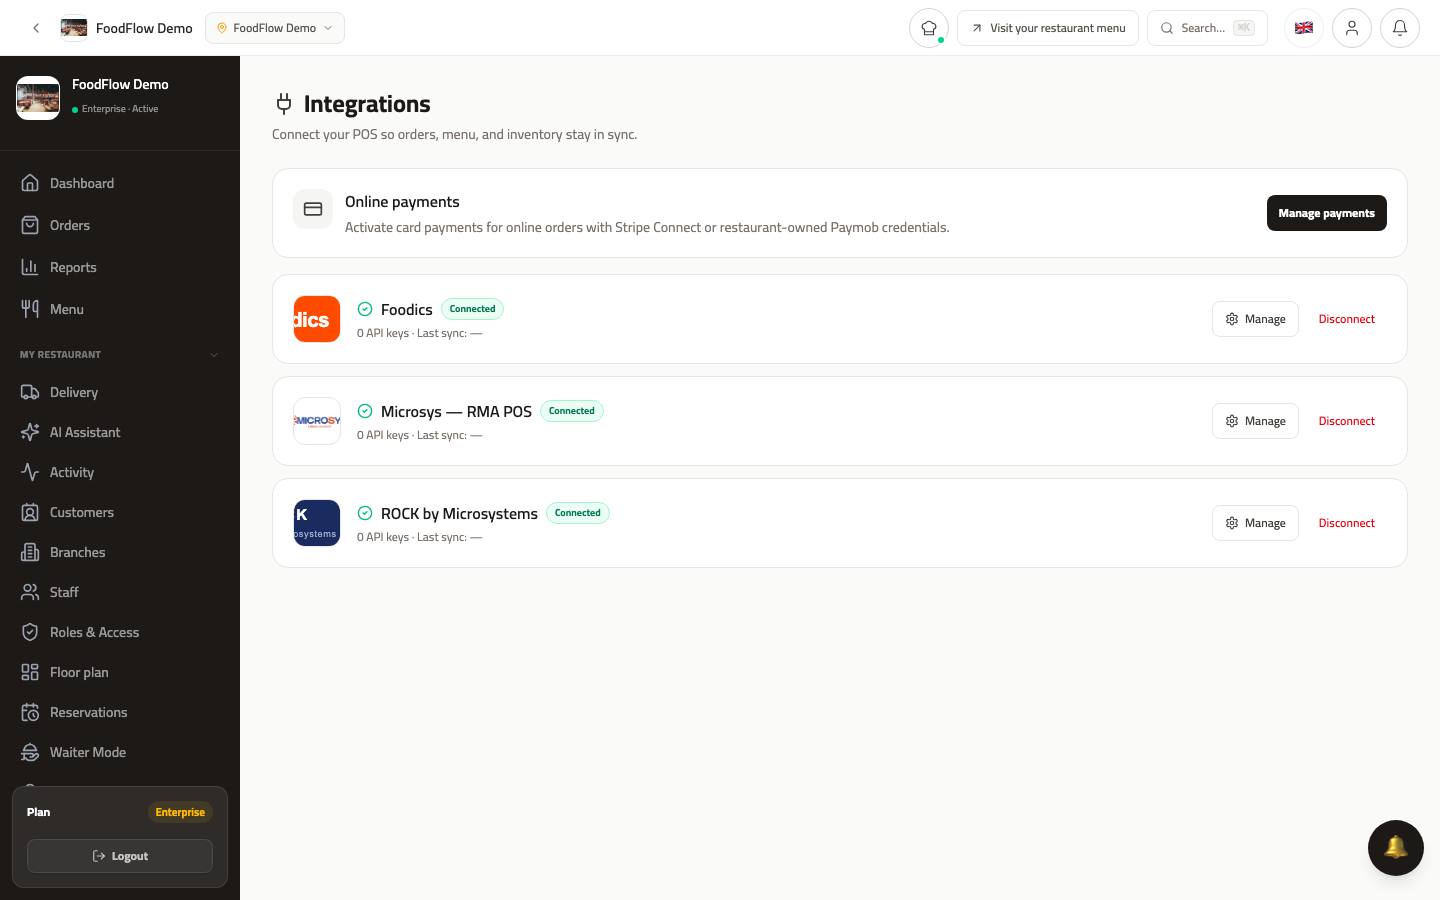
Connect other systems — accounting, delivery, or an existing POS.
Branding
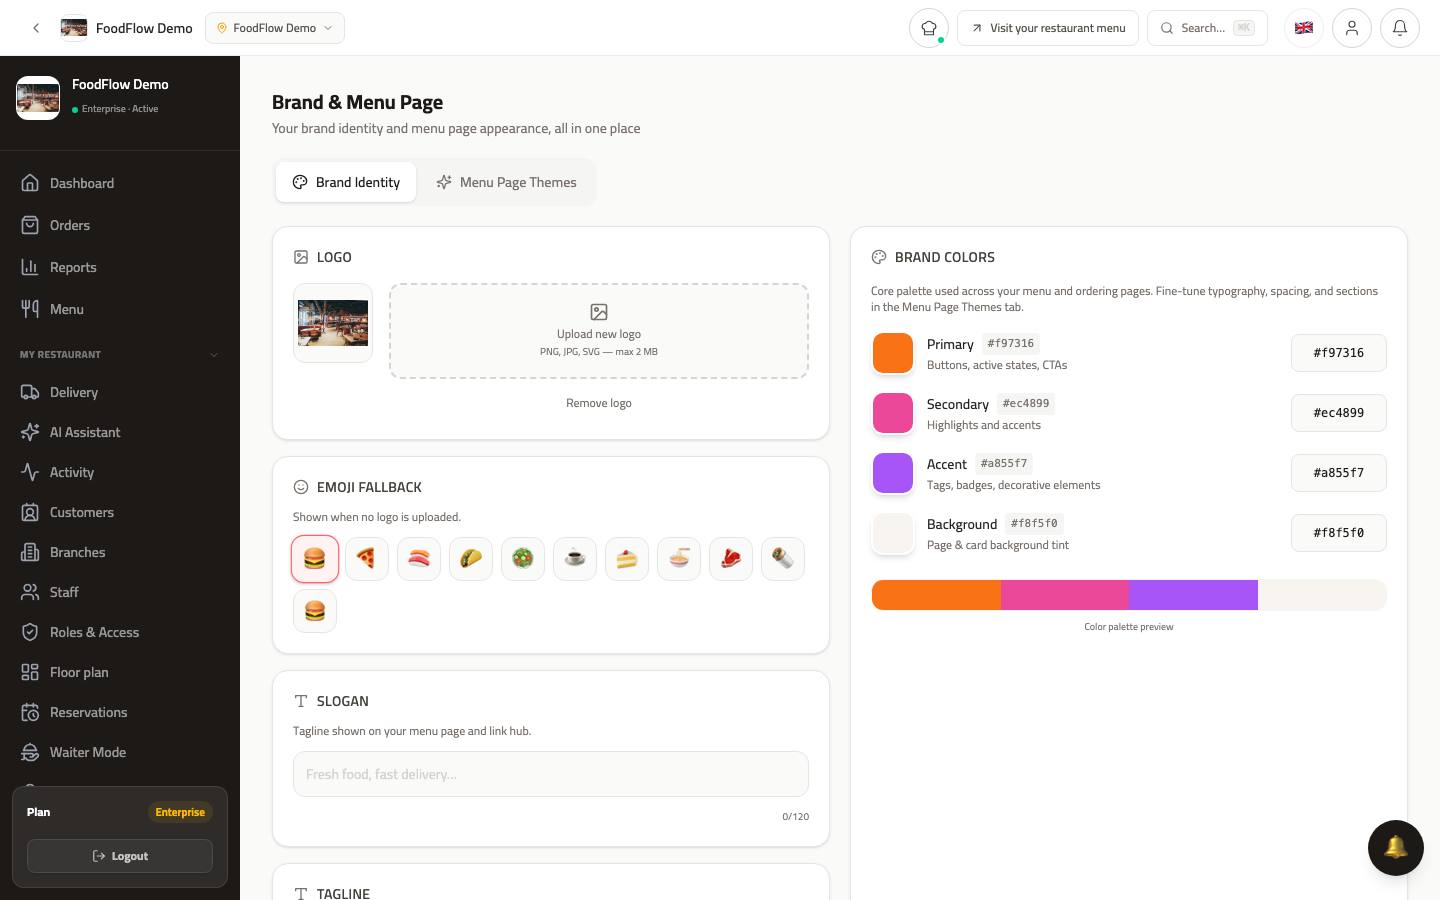
Logo, colours, and tagline — all of it shows up on your menu page straight away.
Reservations
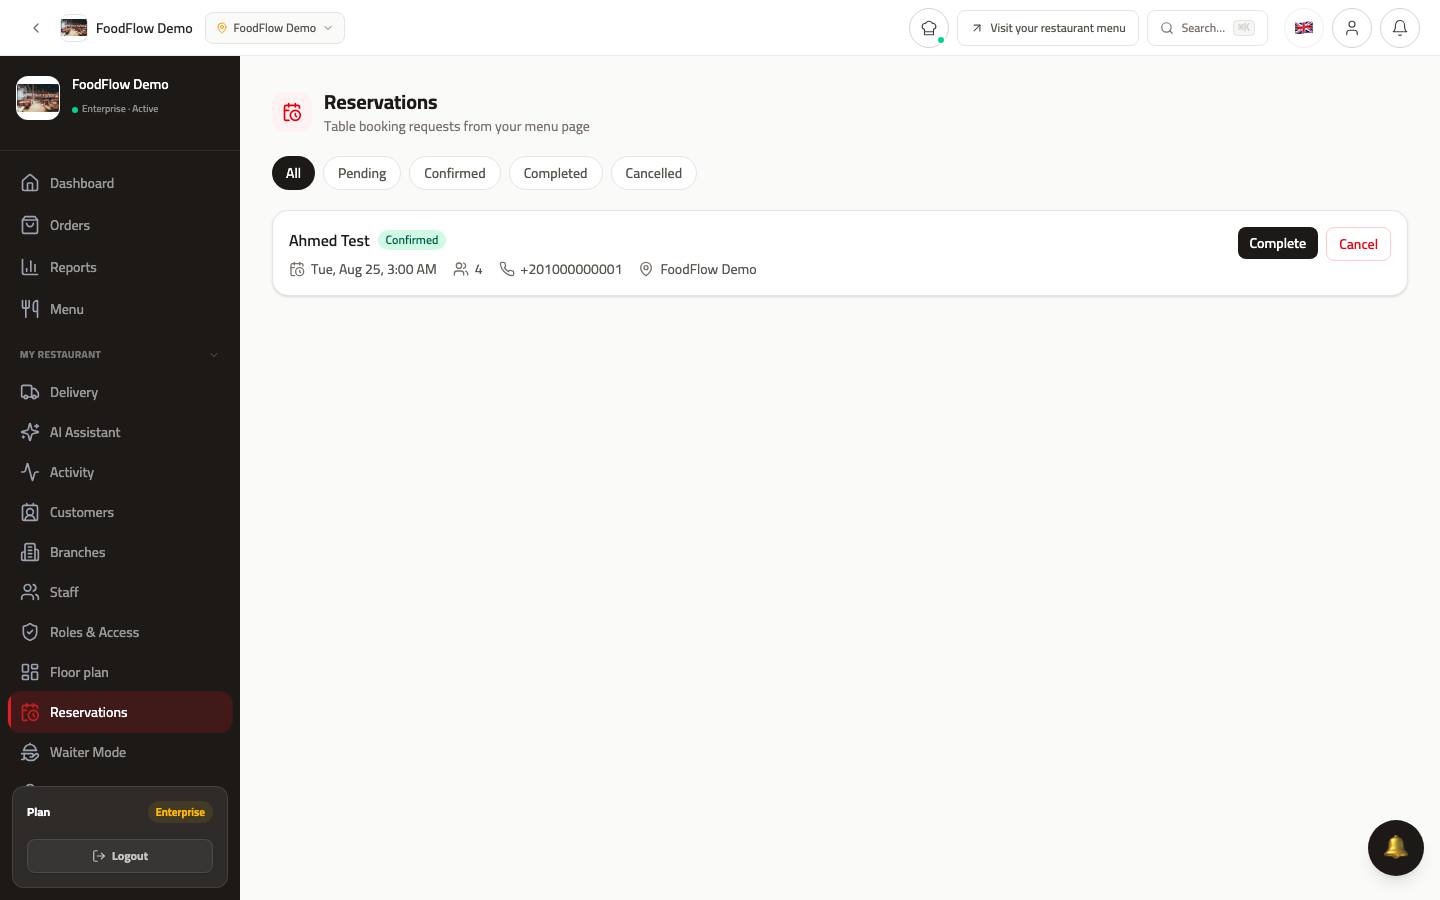
Take table bookings from the menu page and confirm them here.
Customers
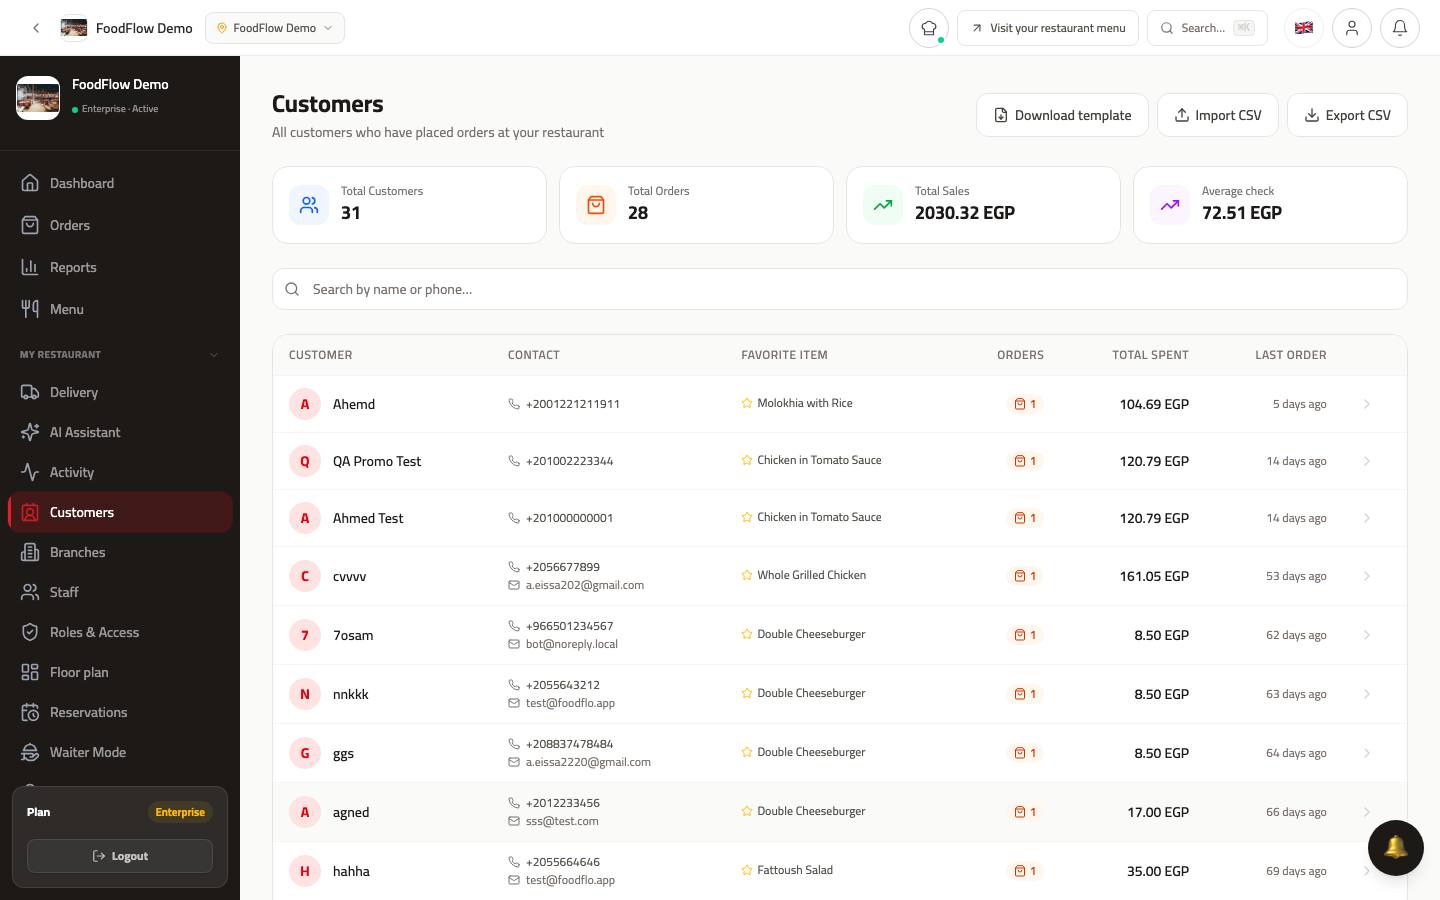
Every customer, their orders, and when they last ordered — the base for any win-back campaign.